Wednesday, May 29, 2019

RETIREMENT CARD


One of our daughters works for the school system.  The superintendent and three others are retiring so she asked me to make four cards for her.  These were fun to make.

The embossing folder is from Darice.  The chair is from Impression Obsessions.. Palm trees an "sand" were from the SU Waterfront set and the birds were from a Hero Arts stamp set. I really like the burlap ribbon under the design.

Thank you for coming by today!

Tuesday, May 28, 2019

HAPPY 90TH BIRTHDAY!


A gentleman who lived down the road from where I grew up is celebrating his 90th birthday and this is the card we are sending to him.

Monday, May 27, 2019

BIRTHDAY CELEBRATION


Stampin' Up! designer paper was used for the frame with streamers and the card base is SU Mint Macaroon card stock.  The packages are from a die from Impression Obsession.


Friday, May 24, 2019

BIRTHDAY BALLOONS


The balloons were die cut after adding a piece of white card stock to a piece of "Stick It" which is a double sided adhesive.  Before adding them to the card I placed the piece on the white piece and made just a very light pencil dot as to where I wanted to sponge some color.  

I accidentally sponged some lavender ink where there was not going to be a balloon so I place the sentiment there.  The sentiment does show up a little better in person.

Thanks for coming by today!

Thursday, May 23, 2019

HERO ARTS STAMP


I had purchased this stamp some time ago and used it one time without liking what I had done with it.  Recently I decided to give it one more try and stamped it twice using Memento Tuxedo Black ink.  On the back of the package it showed the design colored similarly to this.  It took some time to do all the coloring but I'm really liking how it turned out. The design I CASED used only one color of blue but the one I chose first seemed awfully dark after coloring just one flower.  

At that point I was going to cut down the design and just use a portion of it.  Once I got all of the other flowers colored I decided that a few of the darker ones might be a nice addition so I added a few more of the darker blue and used the entire piece after all.  This is the third day of cards using the 5' x 6 1/2" card bases.  

Thanks for coming by today!

Wednesday, May 22, 2019

PENNY BLACK - "TOGETHER"


The stamp is quite large, so I decided to use another of the 5" x 6 1/2" card bases that I mentioned yesterday.  I'm finding that I really like using them.

I placed the stamp in my MISTI, colored it with Distress markers and then lightly misted it with water before stamping it onto the white card stock. 

Thanks for coming by today!


Tuesday, May 21, 2019

STAMPIN' UP! - Sheltering Tree


The father-in-law of a friend of mine recently passed away so I made this card to send her and her husband.  I used the Stampin' Up! stamp set "Sheltering Tree" for the tree and grass.  The sentiment is from a My Sentiments Exactly stamp set.

I stamped the design and sentiment on a 4" x 5 1/4" white card stock and then matted it with the SU Wild Wasabi card stock.  The card base measures 5" x 6 1/2" and is from a pack of notecards and envelopes that I purchased at Michael's.

Thank you for stopping by!

Friday, May 17, 2019

STAMPIN' UP! GINGHAM PAPER


When I ordered the paper I actually thought I'd be getting 12 x 12 sheets, but these are 6 x 6 which is still OK. (My fault because I didn't read closely enough.)  I have always loved gingham checked and polka dot papers.

The card base is A2 size.  The gingham checks is 4" x 5 1/4".  I cut two ovals with Spellbinders dies and added a dimensional daisy from a sheet I purchased recently.  Daisies are such a happy flower.  The only thing left to do was to add the die cut "Happy birthday".  

Thanks for stopping by!

Thursday, May 16, 2019

SU GORGEOUS GRUNGE


One of the blogs I follow is Stampin and Scrapin in GJ.  She has posted some cards using a new Stampin' Up! set called Beauty Abounds.  It is in the new catalog.  I don't have that set but I do have the Gorgeous Grunge set from SU and these stamps are similar to the ones she used.  I thought it was a fun card and decided to CASE it.  I used similar colors but ended up reversing the piece to put the colors on the left hand side.

This isn't my usual style of card to make but it's a fun way to use the stamps. Thanks for stopping by!

Wednesday, May 15, 2019

NEWTON'S NOOK - "Cluck" stamps and dies


Recently I stopped at Scrapmania in Cedar Rapids, IA.  My daughter wanted some 12 x 12 gray card stock.  Once I got in the store I naturally had to look around while others were checking out with their purchases.

I had seen a card like this on their website and found the stamps and dies.  I couldn't resist.  Initially I was just going to buy the stamps but then decided I might regret not buying the dies.

The grass and fence were made with a Martha Stewart punches and the sun is actually from a set of flower dies.

Thank you for stopping by today!

Tuesday, May 14, 2019

BIRTHDAY CARD WITH CANDLES


My mother asked me to make cards for two great grandsons who will have birthdays this month.  I made two like this for her to send.  

Thanks for coming by today1

Monday, May 13, 2019

K&COMPANY DIMENTIONAL STICKER


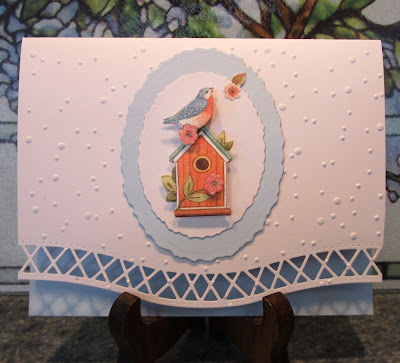
The border die I used is from Penny Black.  It was cut along the lower edge of an A2 size card.  I ran the front of it through my Cuttlebug with an embossing folder.    I found a package of dimensional stickers that I've had for a long time and decided to us one of them on the card. 

I cut two ovals with a Spellbinders die set and then added the sticker.  The final touch was adding a strip of matching blue card stock to the inside of the card to show through the pretty die cut edge.

Thank you for coming by!

Sunday, May 12, 2019

HAPPY MOTHER'S DAY!


I decided to make a cascading card for my mother.  She hadn't seen the one I made recently so I made this one for her.  We are going to meet my brother and his wife in the Amana Colonies for dinner and then we will all go visit my mother.

The picture below shows the box I made for the card.  I tied it with ribbon. These are really fun to make!


Friday, May 10, 2019

FANCY EDGE


I was a little disappointed in this die when I received it.  It makes a beautiful design but it cuts it off of the card.  I had to attach it back on with tape on the back side and then ran a piece of ribbon over the cut edge.  I had assumed that it would make the design like a punch.  Lesson learned.  I had a butterfly on my table and decided to use it.

The turquoise piece was 4 1/4" x 5 1/2" and then attached to the front of a white card base after doing the design.

Thank you for coming by!

Thursday, May 9, 2019

ANOTHER POP UP CARD


It was fun making this card so I did another one but used the dragonfly like the demonstrator in the video I referred to yesterday.  For this one I did the inside a little different. (See below)


Thank you for stopping by!

Wednesday, May 8, 2019

ANOTHER FUN CARD


I found a video for this card on YouTube.  (https://www.youtube.com/watch?v=HmrF03JbcFg&t=24s)  She is a little silly so you might want to skip into the 4 minute mark where she begins telling what she used and then the instructions.

If you make this card, the slit is made with a punch from Stampin' UP!  But be sure to read my comment on the video and her replies which explains why I had to make adjustments to the placement of the designer paper strips.


Tuesday, May 7, 2019

WIPER CARD

I already posted a card today but it is the one that I intended to post yesterday.  We had a very busy weekend.  I helped with the graduation party for one of our granddaughters.  Since my daughter was afraid of running out of food she had way too much and I helped her package some of it.  She sent left over strawberries for me to make strawberry freezer jam.  Besides running my own errands yesterday I made three batches of the jam when I got home and there are enough strawberries still left that I need to either make more jam or process the berries to be frozen.  


Lately I have been having fun challenging myself to make some different styled cards.  This one is called a "wiper card".  (See below)


By gently pulling on the sides a piece will pop up.  If you're making a birthday card with a different type of design on the front you could have a cupcake pop out.

This was a fun one to make and not real complicated.  I hope to do it again with a different theme.  Thanks for stopping by!

A FUN BIRTHDAY CARD


The piece with the sentiment slips out of the front.  You could make this a flat card and just sign that piece.  I did make this into a side fold card.
Thank you for stopping by!


Friday, May 3, 2019

GRANDDAUGHTER GRADUATION


When I make graduation cards, I like to use school colors if at all possible.  One of our granddaughters is having her graduation party tomorrow.  This is the card we will give her.  The card below is very similar and is for my mother to give Emma.  


Thank you for stopping by today!

A NOTE TO "ANONYMOUS".........The dies used on my card says "Lifestyle Craft" on the package.  The graduation sentiment is a "Paper Inspirations" stamp.  Not sure if they still make the stamps.  You might find one on eBay.  The embossing folder is from Darice.  Hope this is helpful.

Thursday, May 2, 2019

USING UP A SCRAP OF DP


A few days ago I had a post with three cards using this beautiful designer paper. It certainly was too pretty to throw away this one last piece.  I matted it with the white and then added it to the note card that has the white polka dots.  The sentiment and one of my favorite little butterflies were then added to finish it off.

Thanks for coming by!

Wednesday, May 1, 2019

APRIL SHOWERS BRING MAY FLOWERS


HAPPY MAY DAY!  Do small children still hand out May Baskets where you live?  I remember making up baskets for our girls to run around town.  They dropped them at the doorstep, rang the doorbell or knocked and then ran trying not to get caught.  The basket were filled with carmel corn and candies.

This is a cute set of dies from Taylored Expressions.  I made this a few days ago, but I thought it would be a great way to start off the Month of May.  I cut two of the pink tulips and cut one of the petals off.  I glued the bottom edge of the petal down but then used a small foam dot to pop the upper edge of the petal.

Thanks for stopping by today!


Jackie Bolhuis had a  video a few weeks ago using these little birds. All of these use the layouts use a strip of dsp measure 1 3/4"-2...