Friday, September 27, 2019

STAMPIN' UP! - Madison Avenue


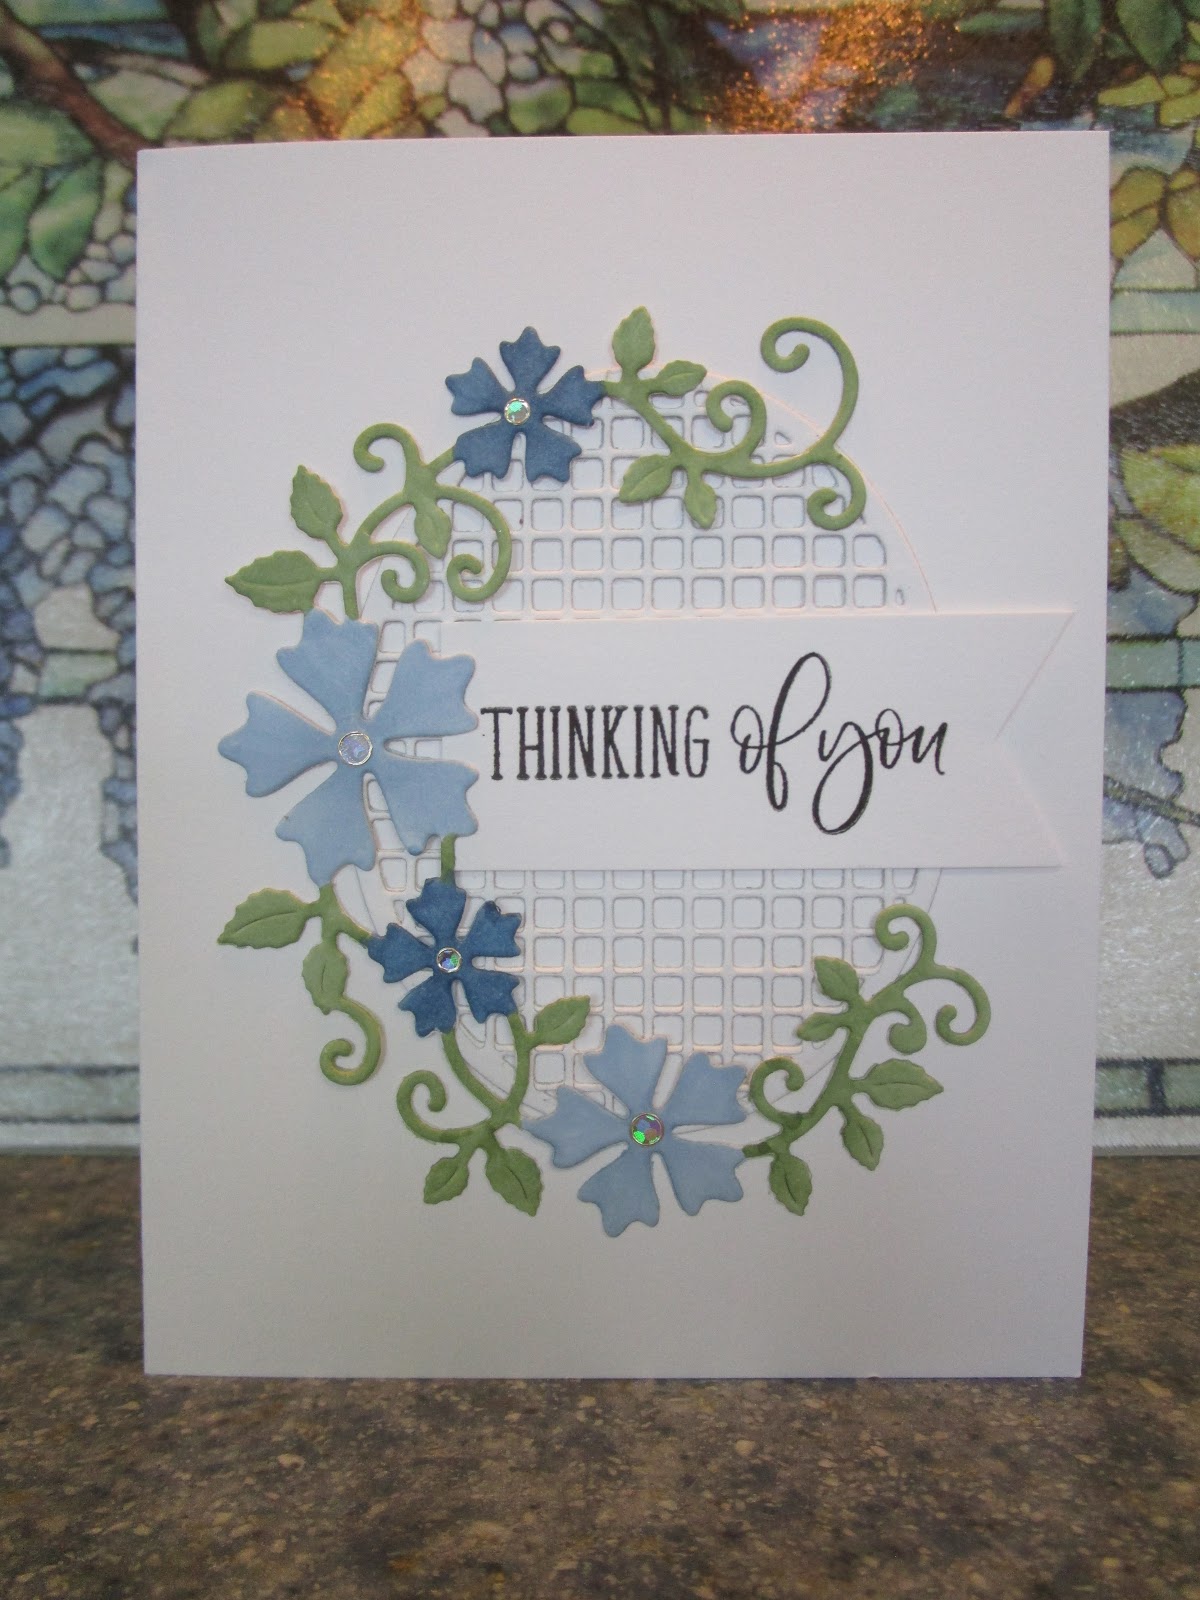
This card is kind of an accident.  This stamp set has actually been to a stamp sale or two and didn't sell.  This past week I have been preparing things to take again and took another look at this set. After scanning through Pinterest posts I found a card like this and really liked it.  SO.......the set is going to be a keeper at least while I make a few more cards. I can see this design done in other colors but with the shades of brown I think it will make a great masculine card.

The photo makes it appear that the white band goes beyond the 5 1/2" width of the card but it is actually flush with both sides.

The stamp sales begins this afternoon and evening and will be open again tomorrow as well.  We have a rainy day today so I'm really glad I packed up the stamps for the sale into the car last night.  I just hope I can unload at the sale between downpours. Thank you for coming by today.

Thursday, September 26, 2019

STAMPIN' UP! - Stylish Stems Dies


I have so many new dies to use but have been concentrating on pulling out some of the ones that I've had for a while but have not been making good use.  This card was made using the dies and the coordinating "Special Reason" stamp set for the leaves.

Thank you for coming by today!

Wednesday, September 25, 2019

HAPPY BIRTHDAY


I saw a video showing how the demonstrator cut the diagonal piece so that the angles were exactly right and like the idea of making some cards with a little different look.  The designer paper is from Stampin' Up! (retired) and is in the stash of papers that need to be used.   I also had one more piece with the birds and thought it worked OK with this paper.

Thank you for coming by today!

Tuesday, September 24, 2019

2 MORE SU "Free as a Bird"


I didn't have the coordinating designer paper yet when I made these cards but I will be making additional cards now that I have that dp. 

Thank you for coming by today.

Monday, September 23, 2019

THINKING OF YOU


I had a little trouble getting the design out of the die but was still able to use most of the design.  I colored the white die cut with Copic markers.  I stamped the sentiment and then trimmed the piece to fit.  The second card below shows the entire die cut and I colored it with the same Copic markers.  I really like this design.


Thank you for coming by today!


Friday, September 20, 2019

A FUN BIRTHDAY CARD


This was such a simple card to make.  I cut a couple of circles into the white layer and added some colored card stock behind the circles.  The two colored pieces are actually adhered to the pink card base.  The white layer was then added to the pink card base using foam squares.  A pink balloon was die cut and popped onto the white layer.  Finally I simply drew the black lines with a sharpie and  added the black die cut "celebrate".

 I think this card would be appropriate for kids and adults alike.  Thank you for coming by today!

Thursday, September 19, 2019

STAMPIN' UP! - Another "Simply Sketched"


Using the same colors and stamp set as yesterday I just changed the layout and added a sentiment on the front.

Thank you for coming by today!

Wednesday, September 18, 2019

STAMPIN' UP! - Simply Sketched


A couple of weeks ago when I was pulling out some hoarded designer papers and stamp sets I hadn't used in a long while, I made this card.

Thank you for stopping by today!

Tuesday, September 17, 2019

SPONGING OVER HEAT EMBOSSING


While I had the SU Pocket Silhouettes stamp set out recently, I made this card.  I stamped the design three times on a piece of white card stock using VersaMark and then heat embossed them with silver powder.  Before using a stitched rectangle die to cut them out I sponged  the Marina Mist ink over the designs.  I used a dry rag to remove any ink that remained on the embossing.

The card base is white and a silver foil layer (4" x 5 1/4") was added to the base.  The white layer with the designs is 3 3/4" x 5".  The designs were added with foam squares after scoring the three lines.

Thank you for coming by today.

Monday, September 16, 2019

POCKET CARD


Another CASE from a Pinterest sighting.  I made four of these cards in different colors.  When the top flap opens there is a pocket in side and the white card is tuck down inside.  There is room at the bottom of the white card to write a short personal message and your signature.

Thanks for coming by today!

Thursday, September 12, 2019

STAMPIN' UP! - Pocket Silhouettes


This is pretty much a CASE of a card I ran across on Pinterest.  One day I decided to pull out a retired wood mounted SU stamp set.  It was my goal to make a card a little different than my usual so naturally I turned to Pinterest and searched out samples of cards using that set.  I really liked this one.  

Using scraps of card stock that I keep in a container, I stamped each design using SU Craft White ink and then heat embossed with white powder.  Each design was cut using a stitched rectangle.  I centered the olive piece on the card base first so it would be centered and attached it with foam squares.  It was easy then to place the navy and orange pieces spaced appropriately also with foam dots.  A simple sentiment was added with navy ink.

Thank you for coming by today!

Tuesday, September 10, 2019

THREE CARDS - Very Simple Layout


Very simple layout!  I have SO MUCH designer paper from SU - not to mention all the others I have.  In an effort to get another partial sheet used, I cut two pieces that were 5 1/2" x 3". The third piece was 5 1/2" x 2 3/4".  Instead of backing the three pieces with an entire piece of black card stock, I simply cut black strips and added them behind the dp and then adhered the pieces to card bases of coordinating colors in the designer paper.   Each card has punched butterflies which don't show up the best in the pictures.

Thank you for stopping by today!

Monday, September 9, 2019

COLOR BURST TREES


A week or so ago I pulled out some dies that I had to have but not sure I'd ever used.  I had a stack of papers that I had made using Color Burst powders. One of the dies I had out was "Tall Trees" from Penny Black. 

The idea for the card came from Pinterest but I changed the vertical card to a horizontal format and instead of a square "window" I used an oval.  The window was cut into a 4 1/4 x 5 1/2 inch piece of ivory card stock.  The sample I saw mentioned putting a piece of vellum behind the window so I did too but not sure that it was all that necessary since the piece was added to a card base.

The sentiment was stamped with a Taylored Expressions stamp and then cut with the coordinating die.

Thanks for coming by today!

Friday, September 6, 2019

USING UP DESIGNER PAPER


I really liked most of the papers that came in this package from Stampin' Up! but this particular design was hard for me to decide how to use it.  These are two cards I made.  

When I stamped the "Fabulous Floret" design on the left card, I discovered a very small black "dot" that was very distracting............therefore, I lined up the little butterfly perfectly to land directly on that little spot.  The card on the right didn't have a smudge. Do you think I should add the little butterfly on it as well?

I'll be posting some more cards next week using paper from this same designer paper package.  Thank you so much for coming by today!

Thursday, September 5, 2019

HAPPY BIRTHDAY, FR. BRIAN!

  
We were only blessed to have Fr. Brian with our parish for about two years but during that time he organized a trip to Rome for the people in our parishes.  It was a trip of a lifetime for us. Thankfully he is in a parish where we have been able to visit him a couple of times and he has been back to ours for a couple funerals.  This is the birthday card we sent him.

Thank you for coming by today!

Wednesday, September 4, 2019

BIRTHDAY CARD


One of my family's long-time friends is having a birthday tomorrow and this is the card I have dropped in the mail for her.  It's getting more difficult for my mother to send cards on her own so I signed her name along with ours.

Thank you for coming by today!


Tuesday, September 3, 2019

STAMPIN' UP! - Daisy Delight


Using the SU stamp set, I stamped one flower with VersaMark and then heat embossed with clear powder. I punched out the piece with the matching SU punch and then punched a second one that I left plain.  The stem and leaves were stamped from two different sets. I think the background stamp used is called "Birch".

I'm not sure how i feel about how this card ended up because the blossom seems awfully big for the stem and leaves.  

Thank you for coming by today!


   These are two cards I made using the second format from Robin Armbrecht's video.  (You can see a link in yesterday's post.)  I li...