Tuesday, April 30, 2013

SIMPLE LAYOUT

 
The "spring/summer schedule" has already begun with soccer, softball and T-ball and we will now be on the run a lot and putting lots of miles on our car.  Posting cards may get rather irregular but I hope you will continue to stop by and see what I have been doing. 
 
So since this is such a simple card, I don't believe it needs any explanation.  It is a layout that would be easy to do with a variety of stamps and designer papers.
 
If you have any questions, I will be happy to address them.  Just email me at the address shown on the right hand side of my blog.

Thank you for stopping by.

Monday, April 29, 2013

BIRTHDAY CARD

 
My friend, Georgia, had a birthday earlier this month.  This is the card I made for her.  The stamps are from a discontinued Stampin Up set "Awash with Flowers".  I stamped the outlined design and then stamped the solid petals with blue ink on white card stock.  I cut them out and added them to the outlined image.
 
I used one of the tiny "blooms" in the set and turned it into a butterfly.
 
Thank you for stopping by!  I hope the week ahead will be a good one for you!

Sunday, April 28, 2013

GRAPHIC 45 - French Country

 
Once again the dp I used on this card is from the same paper pad that I used on yesterday's card.  The stamped images are from SU stamp sets.
 
Thank you for stopping by!

CORRECTION:  The paper is from the same paper pad I was using on Friday's card.

Saturday, April 27, 2013

AUTHENTIC PAPER PAD

 
All paper for the card above and below are from an AUTHENTIC 6 x 6 paper pad.  The butterflies were embellished with flat black metal pieces from Hero Arts.  I like the flat pieces since they will be easier to mail.
 
Thank you for coming by today.  Hope you are having a wonderful weekend!


If it is hard to see, the embossing on the right side of this card is with the SU folder "Flower Garden".

Friday, April 26, 2013

VERTICAL BIRTHDAY


The dp is from Graphic 45 French Country which is a paper I can order for you if you are interested.  The dragonfly and flower images are from two different Stampin Up sets.  The vertical sentiment is from Paper Inspirations.

Thank you for stopping by!

Thursday, April 25, 2013

SU PAISLEY PETALS DESIGNER PAPER


While I was working with this paper yesterday, I also made this card.  I cut out one of the flowers from the designer paper.  The scalled circle that I used for the cut out flower is actually the center of a 6" paper doily.

Thanks for stopping by!

Wednesday, April 24, 2013

FBW #237 Sketch

 
I was wanting to work with this double sided designer paper from Stampin Up today when I happened to see the Flutterby Wednesday Sketch for this week.  It looked like an easy one to do.  In order to get the right angle on the large flower, I had to reverse the diagonal.  I am disappointed that the picture doesn't look like the colors are coordinated.......the popped butterfly doesn't seem to blend well.
 
NOTE:  Someone asked about the punch I used for the butterfly.  It is from SU.


MEMORY BOX "PERCHED REED BIRD"


I believe the dp is from a Webster Pages paper pack.   The fine border was made with a Martha Stewart punch and the birds are from a Memory Box die.  Both were made using dp from Basic Grey "Two Scoops".

Thank you for stopping by!

Tuesday, April 23, 2013

HERO ARTS - CLASSIC BLOOM


The large flower was first stamped onto a piece of Kraft card stock with VersaMark and then heat embossed with white opaque embossing powder.  Next I also heat embossed the large flower and two leaves on ivory card stock.   The leaves and second flower were colored by sponging ink on to them with a swirling motion and then cut out.  When I added them to the Kraft layer, I popped the yellow flower with square foam dots.
 
For the layering I chose a yellow card stock which matched the yellow ink used on the flower and then mounted everything onto an ivory card base.
 
The flower is from Hero Arts but the leaves are from the Penny Black "Dahlias" clear stamp set.  The next time I submit orders to those companies, I can get those items for you and at a discount.
 
Thank you for stopping by!

Monday, April 22, 2013

IN FLIGHT


I ran across a card somewhere (maybe Pintrest) and I fell in love with it.  I ran with the layout and made three cards.  The white top layer was embossed with the Stampin Up Flower Garden folder.  Then I used the butterfly design to punch a butterfly at the top and bottom of the embossed layer.


The white layer was adhered to a piece of Midnight Muse card stock (for the first one shown above) which shows through the two punched designs.  I had a piece of Midnight Muse dp and punched a third butterfly to attach. Two small butterflies were punched from the dp and added. 
When I saw the original of this card, there was a stamped sentiment along the white area on the right hand side of the card base. I decided not to add a sentiment there by adding a wider strip of dp. This way the card is ready for several options.
 
I wish I could get the top punched butterfly turned a little bit more to the left but it just didn't work.  Thank you for stopping by!

(NOTE:  After intially publishing my post, I found the card that I had cased.  I pinned her card onto my page so you should be able to do a search for "Vicki Boddicker" and find items I have pinned.  Chiaki Haverstick is the creator of the card I cased.)
 

Thursday, April 18, 2013

FLUTTER BY WEDNESDAY #236

 
I decided to do a third card with this design and post it on the Flutter By Wednesday website.  The card was to have a butterfly or fairy AND a sentiment on the front of the card. 

PRAYING FOR YOU


Yesterday I was able to get 7 new cards made.  Some are similar to each other.  Five have butterflies and two have dragonflies.  For now I will show you two of the new ones I made. 
 
 I found the patterned dp for both of these cards in a paper pad from Graphic 45 "French Country" 6 x 6 paper pad.  I love making cards with black and ivory or black and white.  The image, sentiment and butterfly are all from SU.  I definitely like the first card the best, but I think this is a really neat design to use for a sympathy or thinking of you type of card.   Thank you for stopping by!


Wednesday, April 17, 2013

FABULOUS FLORETS


Recently Lynette posted a sympathy card she had made using a black stamped design on Kraft card stock.  I had planned to CASE her card very closely.  Her card was made with a horizontal top fold.   After having stamped my image and mounting it, the layer was too tall to do my card that way so I made a side fold vertical card.  This changed the way I wanted to do the front of the card. 
 
Since the image was tall and narrow it left room to stamp something to the side of it.  I have several different vertical stamps that I could have used, but instead I happened to spot this beautiful design on my shelf and used it instead.  By using this border stamp instead of a sentiment, I can now use it for several different occasions with an appropriate sentiment stamped inside.
 
So even though I started off trying to CASE her card, I ended up with a card that was quite different from Lynette's...............but thank you Lynette for giving me an inspiration to get started. 
 
Thank you for coming by!

Tuesday, April 16, 2013

BLOSSOM SPRIG DIGI


This is a second digi which I purchased over the weekend.  My friend, Lynette , had posted a card recently with the image she had purchased.  I knew it was an image I would like to use too.  I colored the flower blooms with two shades and the leaves with two shades of Copic markers. 
 
Most of the time I don't think to choose my papers and then choose the markers I will use and this time was no exception.  I was lucky that the color I used on the blooms went well with the SU Calypso Coral and the leaves went well with the Wild Wasabi dp. 
 
When I see a sketch that I think I'd like to try sometime, I copy them into a folder on my computer.  That is where I got the basic idea for this card.   Around seven years ago I purchased some Spirelli punches and haven't used them nearly as much as I should have so I pulled one out and punched the pieces that are inserted behind the stamped image.
 
Thank you so much for stopping by!  I hope you will take a moment to let me know what you think of today's post.  Questions are also welcome!

Monday, April 15, 2013

SPRING TULIPS


As I write this post, I am listening to the news on TV about the tragedy that happened at the Boston Marathon today.  My thoughts and prayers are with all who attended and were anywhere near what happened.
 
Now for the card.....Over the weekend I purchased four digi images.  This one was such a simple image to color with my Copic markers and the red and bright yellow are something that a lot of us need right now due to all the grey and rainy days that we have had.  We need the rain, but I am ready for some nice Spring weather.
 
The little butterfly is from  and the "Hi!" is from Stampabilities.  Yellow and red card stock is from Stampin' Up.
 
Thank you for stopping by!

Thursday, April 11, 2013

JUST FOR YOU


For this card, I decided to do some paper piecing.  I always like it on cards that others make but don't remember to use it as often as I should.  The papers used for the flower are from Graphic 45 "Place in Time" 8 x 8 paper pad.  The purple layer under the flower is SU Elegant Eggplant and was edged with a scallop punch.  A white layer which was embossed with an SU folder was added to the Elegant Eggplant card base. and then the flower layers were attached.
 
Thank you for stopping by!

Wednesday, April 10, 2013

SPRING DAFFODILS


This is a card I made for a monthly "Artist's Choice" card swap.  I wanted to have a popped layer for the design so I cut a piece of white card stock that was approximately 4 x 5 1/4 inches.  
 
The flower pot and flowers are two stamps from Penny Black's "a bunch" clear stamp set.  I stamped the flowers right onto the white card layer and colored with markers.  The flower pot was stamped on a separate piece of card stock, colored, cut out and then added over the stamped flower image. 
 
The sentiment was added in the upper right hand area of the popped layer.  After I attached the layer to the white card base with foam squares, I wasn't quite satisfied.  I added the gems and felt much better about the card.  Hopefully the recipient has received the card by the time this post appears.
 
Thank you for coming by!

Tuesday, April 9, 2013

SECRET GARDEN STAMP SET


I love the papers from Graphics 45 paper pads and I just love this color of peach dp.  I believe these were from the Once Upon A Time paper pad.  The flower image was stamped and then cut with the die from the SU Secret Garden set.  I didn't stamp the leaves because the papers had a nice variety of color so I simply cut them out with the die. 
 
This card was made several weeks ago but I think the checkered background dp was a scrap so I added the embossing on the top and bottom edges of the card base.
 
Thank you for stopping by!

Monday, April 8, 2013

PPA156 COLOR CHALLENGE

 
I saw the color challenge for the Pals Paper Arts and decided to make a card for it.  I love these Stampin Up colors:  Certain Celery, Bashful Blue and Marina Mist.  The flower layers were punched and then I slightly cupped the petals of the two large layers.  Leaves were made using the Secret Garden leaf die.  Cuttlebug embossing folders used were the D'Vine Swirls and Swiss Dots.

WATERCOLOR WONDER STAMP SET


The PTI Watercolor Wonder stamp set was still on my table so I decided to play with it again.  I used three of the newest SU colors:  Summer Starfruit, Primrose Petals and Gumball Green.  Then I simply stamped the image from Fabulous Florets stamp set with VersaFine Onyx Black ink.  Gumball Green was sponged around the stamped images.  (This time I'm not sure I like it - I may have added too much.)  A layer of Primrose Petals card stock was added under the stamped images and then mounted onto the Gumball Green card stock.
 
I like the idea of stamping an image with black over the watercolor images but I think I would choose a different green for the stamp and for the card base.  Maybe Wild Wasabi because it isn't quite as harsh.
 
Even though this is not one of my favorite creations, I still decided to post it for you to see and maybe make changes of your own to a similar card.
 
Let me know if you have any suggestions - I always enjoy the comments that are left.  Thank you for coming by!

Sunday, April 7, 2013

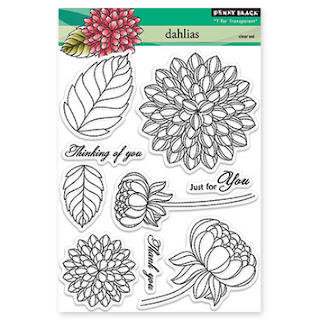
PENNY BLACK - DAHLIAS

 
Recently I ordered this set for myself from Penny Black.  I wasn't real sure if I'd get a lot of use out of it but for some reason I was drawn to the large flower.  I had an idea for it based on a card I had made at a workshop.

 
This is the first card I made with it.  I cut the three pieces of white card stock.  Using the middle and bottom white layers, I stamped the large flower onto both at the same time.  (If you try this and there is a small gap of the design between the two layers the colored layer you place behing it will cover that gap.)
 
For this card I wanted to use the SU Perfect Plum ink to stamp the large flower and to color the main image.  Memento Tuxedo Black ink was used to stamp the flower and then I colored it with the Perfect Plum marker.  There was a minor problem - the Perfect Plum was a little too dark and the petals didn't show up very well.  Since the stamp is clear, I simply inked up the flower bloom with the black ink again and carefully stamped it over the top of the Plum color.  I was relieved that it lined up just right. 

 
I had so much fun making that card that I decided to make a second one and used a lighter color - Marina Mist.  Oh and I moved the leaf close to the stem this time.  On the first card I actually added it to cover a little "irregularity"......you know how that happens?  I definitely like the second card the best.
 
If you would be interested in this stamp set, let me know.  It retails for $15.49 plus your sales tax.  My price is $11.50 plus $1.85 to send it.  (Sales Tax only applies to Iowa residents.)  If you would like to order a set, I am submitting an order to Penny Black on Tuesday, April 10.  Orders need to be in to me by Noon, Central DST.

So what do you think?  I always appreciate it whenever you leave a comment.

Saturday, April 6, 2013

AWASH WITH FLOWERS STAMP SET

Since I didn't get anything posted yesterday, I am showing you two cards today which were both made from the same stamp set.
 
 
I actually made this card a few weeks ago.  I am loving the SU Awash with Flowers stamp set.
 
 
This is another card I made with the same stamp set.
 
THANK YOU FOR STOPPING BY!

Wednesday, April 3, 2013

JUST FOR YOU


I made this card a couple of weeks ago and I'm not remembering the exact supplies I used.  The front of the card was embossed with the SU Framed Tulip Border folder on SU card stock.  The flower and leaves are from the Secret Garden set.  I stamped the flower on dp and then cut it with the coordinating die.  The leaves weren't stamped at all but just cut using dp.  I like that the green dp had a design that gives the leaves a little variety in color.
 
If you have any questions, just email me and I'll be happy to help if I can.  Thank you for stopping by!

Tuesday, April 2, 2013

HAPPY BIRTHDAY, JOANNE!


This is a card I sent to my friend, Joanne for her birthday which is today.  The image is from Penny Black.  I stamped with Memento Tuxedo Black ink and then colored with my Copic markers.  I trimmed the image and then sponged Wild Wasabi ink around the edge.  The card base was embossed with the D'Vine Swirls folder.  Two strip of Wild Wasabi dp were attached to the back of the stamped image and then added to the card base.
 
Wishing Joanne a very special birthday today!!!
 
Remember if you are interested in Penny Black stamps or Copic markers, I would be happy to get them for you.  Thanks for stopping by!

Monday, April 1, 2013

OPENING OF BASEBALL SEASON

 
I heard that April 1 is the official opening of baseball season and I had a card that was perfect to post today.  Recently the coach who led our local high school baseball team to many of the 20 State Baseball Championships celebrated a special birthday so I made this card for him.
 
The stamps used are from a retired Stampin' Up set.  The card base is Kraft card stock.  Images were colored with my Copic markers.
 
Thank you for stopping by!

This is the  video  I used to make this card using more retired dsp. After I finished, I was a little dissatisfied with the white background...