Monday, February 28, 2011

USING PIECES

I have a lot of stamp offs in a file and they aren't doing any good sitting there.  A few days ago I took some out and colored them.  These two cards are from those stamp offs. 


Owl designs seem to be very popular now.  This one is from a Stampendous stamp which I probably purchased at Michael's.  The embossing folder is from Craft Concepts.  Copic markers were used to color the image.


This design is a stamp off from a friend.  Design was colored with Copic markers.  Papers used on this card are from Lasting Impressions.

THANKS FOR STOPPING BY!

Sunday, February 27, 2011

BLUE AND LAVENDER

Our Yahoo Group is having a Blue and Lavender card swap this month.  Most of the time I sign up to have a partner but this time I wasn't sure if I'd have time so I signed up as a "Virtual" swap - which means I can make a card to post in the folder but not send it.

This plaid paper has been in my paper stash for so long and at times I wondered why I had bought it.  (Any f you have that same problem?)  I used the Spellbinders Beaded Ovals die set to cut and emboss the white layer.  The flowers are some that I bought in a bucket of these at Michael's in the wedding section.  I colored them with my Copic CIAO markers.  When I first started buying the Copic markers I wondered why anyone would need so many colors.  In this case it was so nice to be able to pull out colors that really matched the paper so well.  (Two of the flowers in the cluster are actually lavender but the picture is almost making them all look blue.)

I placed the flowers approximately where they would be attached and then stamped the Hero Arts sentiment using a VersaColor cube which also matched very closely to the lavender color.  Pearls were attached to the center of each of the flowers and my project was finished.

Thank you for stopping by.  Hope you are having a wonderful weekend!

Saturday, February 26, 2011

CAMEO DIE

For this card, I think the papers and embossing make all the difference.  I used the portion of a Cuttlebug embossing folder for a strip to be mounted on the front of the card.  The oval frame, cameo and small ovals are all from a Spellbinders S3-033 Cameos and Brooch die set.  I've had these dies for a LONG time and wasn't ever able to come up with a way to use them that satisfied me.  The designer papers are from a Graphic 45 8" x 8" paper pack called "Le Romantique".  The papers are gorgeous.  The punched edge doesn't show up very well in the picture but it was made with a Martha Stewart design.

Thanks for stopping by.  Watch for a special surprise here next week.

Friday, February 25, 2011

A NEW "TOY"

A few months ago I had the honor of being invited to be on a design team for Creating Memories in Time.  Since then I have been making cards with Quickutz dies for her store on eBay.  A few days ago I received a new toy to highlight for her.........the Lifestyle Letterpress.  When I opened the box I was a little intimidated because it was something completely different than I had ever used.

Today I took the time to see what I could do with it. The Lifestyle Crafts "Letterpress Starter Kit" can be purchased from Creating Memories in Time and is currently on sale.  The tool is great if you are wanting to make a quantity of one design but also makes great individual projects as well.  There are several YouTube videos that demonstrate how to use it which I found very helpful.  To see a variety of patterns that are available for the Letterpress go to Creating Everlasting Memories and then do a search for "Letterpress" for the various colors of ink and other designs which can be used.  For my first try, I was pretty pleased with the result.

The information with the Letterpress says you need an Epic 6 machine to run the plate through. It does also work with a Cuttlebug as I discovered on YouTube.

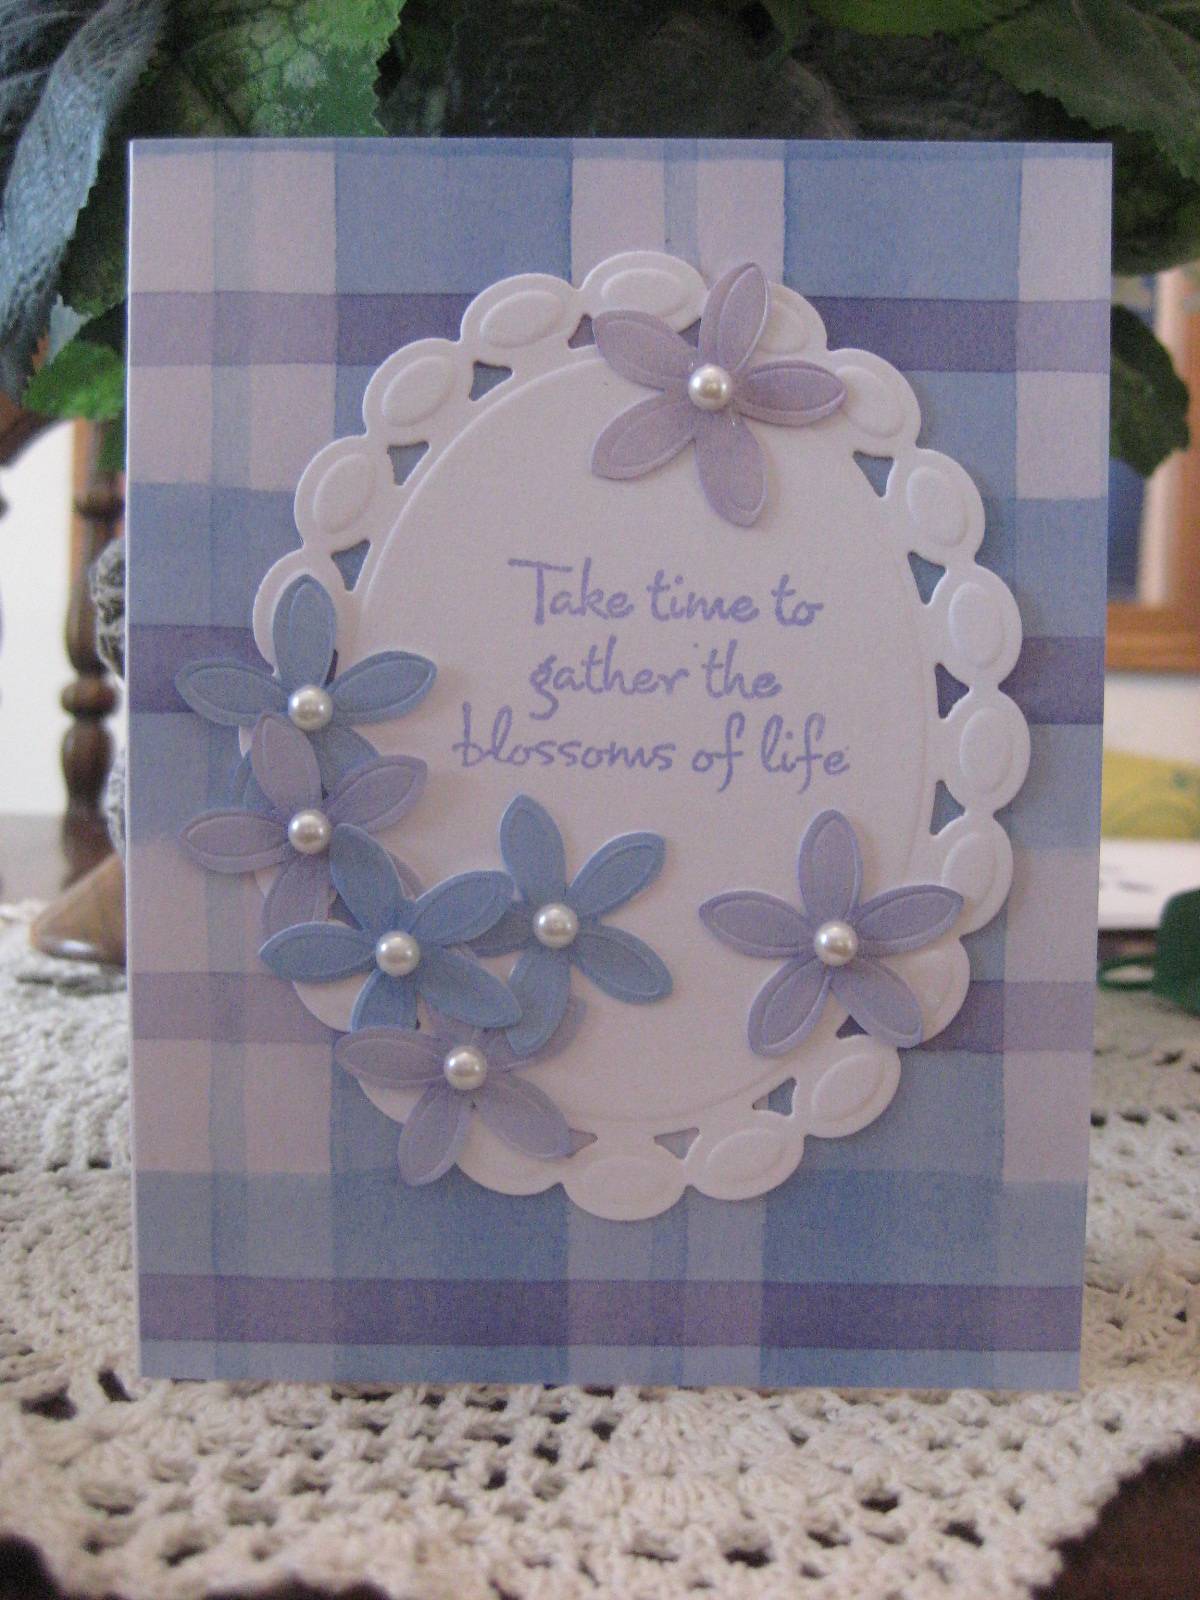
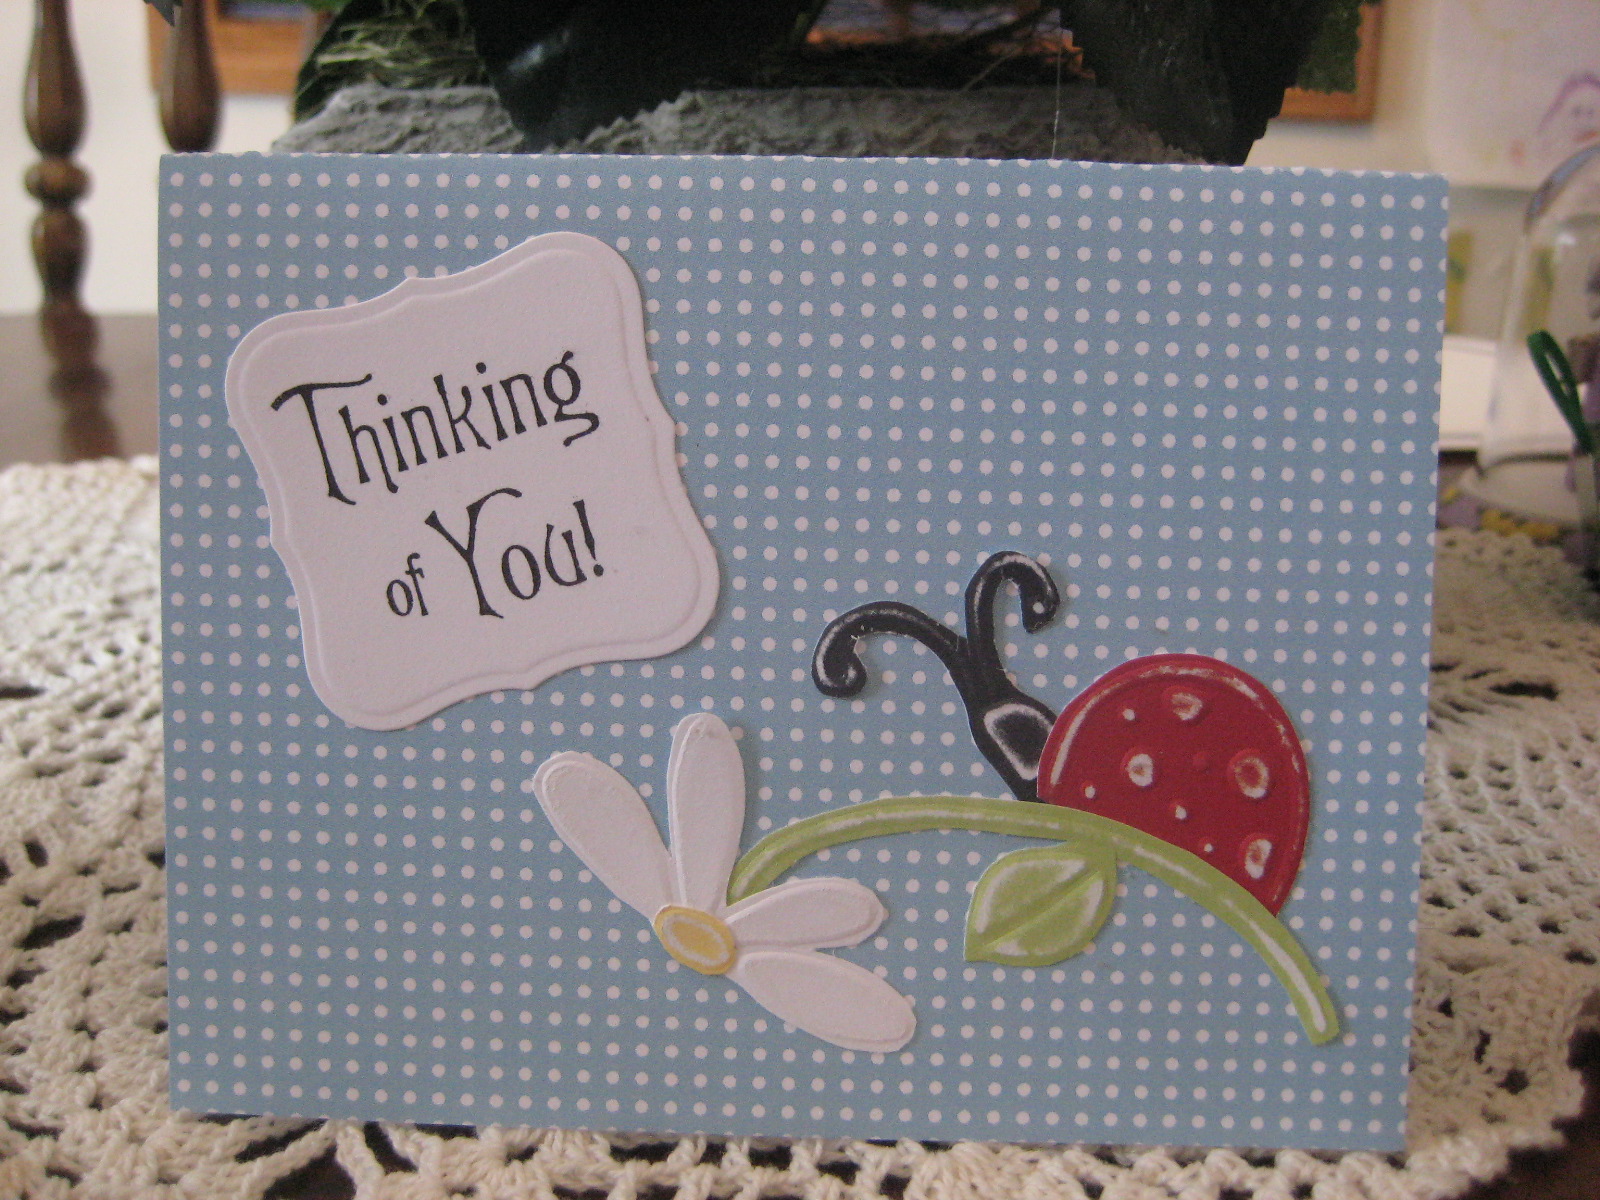
The designer paper I used is from the BasicGrey "Origins" 6 x 6 paper pad.  The butterfly was made using the Marvy Uchida Silhouette and Embossing Punch.  Black pearls from Hero Arts were added to the butterfly.

So have any of you used a Letterpress yet?  Let me know what you think......I'd love to hear from you.

Thank you for stopping by!

Thursday, February 24, 2011

LADY BUG

Just another dry embossed card today.  Doesn't need much explanation.
If you have any questions, just email me.
Thanks for stopping by................comments are always appreciated!

Wednesday, February 23, 2011

ANNOUNCEMENT & DRY EMBOSSING

Just a quick announcement to let everyone know that there are 36 new Copic CIAO colors.  I have most of them here now.  There are also 12 new Copic Sketch colors which I will be able to get for you as well.

I also just received 5 of the new Spellbinders sets but have listed them on eBay.  The ones I received are the Parisian Motifs & Parisian Accents, Fleur De Lis Motiffs & Fleur De Lis Accents and the Floral Doily Accents.  Let me know if you are interested in purchasing them and I will pull them from eBay.
As I mentioned a few days ago, I hadn't done any dry embossing with brass stencils in quite a while but made a card for a Yahoo Group card swap.....which card has not been revealed here yet.  I had these papers from Lasting Impressions out from a card I posted earlier.  The Daisy stencil is also from Lasting Impressions.

Oh and I know she won't see the post here, but wishing my MIL a HAPPY 91ST BIRTHDAY today.  :)

Thank you for stopping by.................hope you come back again soon!

Tuesday, February 22, 2011

BABY CARD

Two of the dies I received to use for the design team were the ones I used here for the square frames and letters.  The white background squares are actually the scrap pieces from the window cards I posted a couple of days ago.  Fortunately I had them still on my craft table.  It worked out perfect to cut the pink frames to go on top of the white squares.  The alphabet was cut from the Banana Split alphabet set from Quickutz.   Since the pink frames and letters were so tiny, I ran them through my Xyron for the adhesive.

Card base is Lasting Impressions Ballet Paisley paper.  The little dp baby squares are from a sheet I've had in my stash for a long time.  The Banana Split alphabet set can be purchased here: Banana Split Alphabet Not a real creative card but I do like the squares.

Hope you all have a great day...............thanks for stopping by!

NEW ITEMS

I am excited to say that beginning very soon I will have access to 20 NEW Sizzix Embossing Folder Sets.  You can see them on my "New Merchandise" Blog Page.  You will find the link to it on the right side of this blog page under "My Store".  These retail for $10.99.  My price will be $8.75 plus the necessary shipping.  Shipping can be kept to a minimum by having me remove them from the plastic cases that they normally come in.

Monday, February 21, 2011

BLOG AWARD & GRANDSON'S BIRTHDAY

Blog Award

A recent visitor to my blog, Robin Kirkpatrick, surprised me this morning by honoring me with this blog award.  Please be sure to visit Robin's Rubber Room.
The Liebster Blog Award is given to bring newer blogs to light and originated in Germany. It's a great way to share blogs that might not otherwise be seen or ones you want to share with others. They should have less than 150 followers.

As a recipient of this award I must share the love and pay it forward by:

1 Creating a post where I blog about the Liebster award and reveal my 3-5 blog picks
2 Letting the honorees know that I selected them
3 Copying and pasting the blog award on my blog

These blogs are not new but they are blogs you should check out!

Sheri Danielson:  Fun With Paper
Harriet Skelly:  Alley Cat Cards
Lynette Neus:  My Stamping Addiction
This card was made for my mother to give to her great grandson (our grandson) for his bithday and I neglected to post it here at the time. 

The card base was light blue card stock.  I took a scrap of light brown paper and tore it to give the appearance of hills.  Click here:  "Tractor" Die if you wish to purchase the tractor die.  Currently it is on sale for at 75% off.  The (KS-0738) "Tree" Die is currently available at 40% off.  I believe the die used for the cloud was from Papertreyink.

Our grandson is a John Deere fan so I had to make the tractor in green and yellow.  I think it was a hit.

Thanks for stopping by!

Sunday, February 20, 2011

JUST FYI

One of the companies where I order items is adding a lot of new products...........including the new Sizzix embossing folders and some Sizzix dies.  I am including two links for you here so you can browse the new products from 2010 and the newest supplement showing the new Spellbinders and Sizzix items.

Products Performers Supp Fall 2010
PRODUCT Catalog Retail 2011

This company has a wide variety of items that I can get for you so please don't hesitate to ask about any of them.  Let me know if you are interested in purchasing at my normal discount.

ORIENTAL LANTERN

Today's card is quite a bit different than any I've made before.  Recently I received some Webster Pages papers from Joans Gardens and I already had the Lantern die from Creating Everlasting Memories.  To purchase the lantern die which at this time is 75% off, click here:  (Rev-0158) "Lanterns" Die.   Even better I had purchased the Cuttlebug Oriental embossing folders bundle quite a while back. 

I trimmed one of the 6 x 6 papers to include an appropriate portion of the design.  A piece of the off white card stock was run through the Cherry Blossoms folder and a strip cut for the bottom of the card.  I ran a sponge which had been inked with Tim Holtz Distress Ink (Brushed Corduroy).  I also sponged the distress ink around the edges of the dp.

The lantern was cut using Core'dinations papers and adhered to the front of the card.  The sentiment is from a set of Stampendous wood mounted stamps.

If you are interested in Tim Holtz products, let me know and I will order for you with my normal discount.

Thanks for stopping by!

Saturday, February 19, 2011

CORRECTING AN INK SMUDGE

I doubt there are any stampers out there who haven't now and then gotten an ink smudge from a finger or some other boo boo.  We learn to be creative in order to cover those up so that the entire project doesn't get discarded.  One of my favorites is having the card all done and then when I stamp the sentiment inside the card as a finishing touch, I accidentally get a little ink on the inside from a finger.  Little butterflies or flowers can cover those up and actually look like they were supposed to be there. 

Today's card is using the same set of Papertrey stamps.  While I had the stamps all centered just the way I liked them, I thought it would be good to make another card.  On this card I used an ecru card stock and Stampin Up Baja Breeze ink.  When I stamped the birds into the open windows, the stamps cling just a little to the card stock so I tip the upper edge of the acrylic block up to lift it off. 

Well, I must have had a little ink on the very edge of the acrylic block so I noticed there were little hints of the ink just above the "Thinking of You" sentiment.  OK.........now what do you do!?!?  I had taken the Michelle Zindorf class last summer and we did masking with post it notes.  So I decided to give it a try.  I masked off the narrow area above the sentiment and sponged on ink and then repeated it below the sentiment.  It worked!  And I like it.

So how do you "cover up" little boo boos on your cards?  I'd love to hear your ideas!

ANOTHER PAPERTREY SET

Friday, February 18, 2011

On Your Birthday

I have my friend Sheri (SHERI'S Fun With Paper) to "blame" for this card.  Our Yahoo card group is a bunch of very enabling stampers............but oh so much fun!  Sheri sent me a card recently with some designs that I had wanted for cards and she enclosed them in a card made with a similar set. 

PapertreyInk.com sells four sets of "seasonal" stamps and a die that cuts out the three windows in one single cut.  This card was made using the Spring set of stamps.  The first thing I did was to center the die on my card front and run it through my Cuttlebug.  I then stamped the sentiment and made the scored lines above and below the sentiment.

Next I placed the card front face down on an acrylic block and was able to attach the set of three stamps to the block through the cut out areas.  I wanted to make sure they were centered in each of the squares as close as possible.  The designs were stamped using SU Tempting Turquoise ink on a separate piece of paper measuring 5 1/2" x 4 1/2". 

To attach the stamped image to the back side of the card front, I ran tape across the top edge of the inside fold and then carefully attached the stamped piece.  Additional tape was then added to attach the stamped layer.

Sheri, is only one of the enablers that I have.  There are so many wonderful artists making cards and I find myself "needing" a lot of new items from time to time.  :)

Thanks for stopping by..............would love to hear your comments.

Tuesday, February 15, 2011

EMBOSSED FLOWERS

Our Yahoo Group of ladies has a card swap for later this month to use embossing - dry embossing or using embossing paste.  I have a large collection of brass stencils that have gotten pretty lonely in the closet.  Yesterday I made a card that has been set aside for that swap but I enjoyed doing it so much I decided to emboss a few more pieces today.

The card base was embossed with the Cuttlebug D'Vine Swirls and although the bottom left corner looks blank it is fully embossed but for some reason the picture doesn't show it.  The papers are all from Lasting Impressions.  Their papers have a great white core so the pieces can be scuffed.   I had never used the colored papers on this card and I saw someone use them recently for a Valentine.  Her card was so pretty and I remembered having some of those colors.

Flowers were embossed, cut out and scuffed.  If you haven't ever done any dry embossing and would like to give it a try, I have many stencils still in their original package that I am clearing at $4.00 each.  Let me know if you would be interested.

Thank you for stopping by.................tell me what you think.

Saturday, February 12, 2011

ROSES FOR VALENTINES DAY

A few days ago I found the Cuttlebug 5 x 7 Brocade Window Embossing Plus folder on sale.  It arrived yesterday and I love it!  This card measures only 4 1/2" x 6 1/4" so I carefully centered the off white card stock in the folder.  Since I don't have envelopes for 5 x 7 cards, I scaled it down and I think it still looks pretty. 

After running the piece through the Cuttlebug, I put it on top of the card and placed the stamp itself right in the center.  Fortunately I was able to remove the embossed piece over the stamp.  By using my Stamp-A-Ma-Jig I was able to stamp the image right where it needed to be.  I colored the roses with SU Cherry Cobbler and Mellow Moss markers.  (I think I would use the Real Red marker next time since the Cherry Cobbler is pretty dark.)

This would also make really pretty card for someone's anniversary so I will leave the inside blank for now and stamp it later with an appropriate sentiment.

Thank you for stopping by..............hope you come back again soon.

Thursday, February 10, 2011

VALENTINES FOR GRANDCHILDREN

Sorry it has been a full week since I posted any cards. We've had a lot going on with grandchildren. On Tuesday I was able to finally get back to work, but eBay was offering free listings for up to 100 items so I just had to take advantage of that. (I listed over 100 Lasting Impressions in case you are interested.)

Yesterday my goal was to get a good start on 14 Valentines. My mother-in-law needs 8 and I needed 6. All but three were finished last night and they are now all ready to put in the mail.  Today I am posting the cards that we are sending to our grandchildren. 

This card is for our grandson, Tucker.  My friend, Sheri, sent me some stamp-offs of this cute little guy after I saw a card she had made.  I added some extra hearts around him.  The images were colored with Copic markers.  I trimmed the piece down and then punched two corners with a Martha Stewart corner punch and the opposite corners with a corner rounder punch I had.
I made two cards like this to go to our granddaughters, Ashlyn and Abby.  The image is from a Penny Black clear stamp set.  It was colored using Copic markers and then cut with the Spellbinders Labels 1 die set.  The embossed hearts  are from a Cuttlebug embossing folder.
Our granddaughters Emma and Taryn will each receive this card for Valentines Day.  The stamp is from a Hero Arts clear set of stamps.  The background embossing is a D'Vine Swirls Cuttlebug folder.  The image was stamped and then cut with a Spellbinders classic rectangle and then edged with a red Copic marker.  A second white layer was cut using the classic scalloped rectangle and again edge with the Copic marker so that it would show up on the white card. 
Our granddaughter Allissa will receive this card from us.   

The embossed background is from the D'Vine Swirls Cuttlebug folder.  I stamped the Penny Black design and cut out the image using a Spellbinders die.  The image was colored using Copic markers.

Friday, February 4, 2011

HERO ARTS - LARGE FLOWER PATTERN

This card was another very easy piece to put together.  The card base is off white.  I took a second piece of off white card stock which was cut slightly smaller than 4 1/4" x 5 1/2".  Using the beautiful Hero Arts S5471 Large Flower Pattern, I stamped the image using the Hero Arts Shadow Ink "Soft Blossom".

I then took third piece of off white card stock which was 4 1/4" wide and punched the fancy border with a Martha Stewart punch.  Just above the punched edge I stamped Happy Birthday with the same Soft Blossom ink.  The stamped and punched piece was trimmed then with a flat edge just above the sentiment.  I didn't like the harshness of the plain edge so I punched a second small piece, trimmed it for just the scallop and attached it to the back side of the sentiment.  This finished off the top edge.

Your thoughts are always welcome.  Thanks for stopping by!

Thursday, February 3, 2011

SUPER SIMPLE - BUT ELEGANT

I've had my mother staying with us for a couple of days through the bad weather so today's card really is a SUPER SIMPLE one.  However, look at the possibilities that this leaves.  By adding a delicate sentiment under the bottom embossing, you can turn this card into one for many occasions.  By slightly lowering the design,a monogram could be used above the design and make it a very personal card.  Make up a set and that would make a really great gift for someone.

The stamp I used is from a retired SU set called Beautiful Borders. (I was lucky to find this at a great price on eBay.)  The ink I used is from Hero Arts - Soft Blossom Shadow Ink - and it looks beautiful on off white card stock.  The embossing was done with a Cuttlebug border folder.

Thank you for stopping by.  I hope to get some new cards made soon.

Tuesday, February 1, 2011

FEBRUARY CALENDAR

Just a quick entry here.  It's 10:30 PM and I wanted to get this up on February 1st.  :)  We're under blizzard conditions here so it makes a difference in my schedule.  When weather is bad we bring my mother in from the country to stay with us in case the power goes out.  While she is here I need to spend time with her and not hibernate in my craft room. 

The top part of the calendar was embossed with a Cuttlebug embossing folder.  The stamped design is another $1.00 stamp from Michael's which I stamped with Memento Tuxedo Black Ink and then colored with Copic markers.  The design was cut out using a Spellbinders Label One and then I edged it with one of the Copic markers.

All for now........it is time for bed!!!  Thanks for stopping by!

This is the  video  I used to make this card using more retired dsp. After I finished, I was a little dissatisfied with the white background...