Thursday, September 30, 2010

IT'S ALMOST OCTOBER

Since I didn't have a card I wanted to post for today, I decided I'd go ahead and show you my little calendar for October.  The pumpkins are from a sheet of unmounted red rubber stamps which I must have purchased last year and didn't use.  The stamps are from Sweet Pea Stamps. 
Starting tomorrow, I'll be giving you some ideas for Halloween cards.

Thanks for stopping by!

Wednesday, September 29, 2010

AS EASY AS IT GETS

I wasn't going to post this card because it is truly a case of a card my friend, Lynette, made a while back.  I am trying to get Halloween cards made early for our grandchildren because I have a project coming up that is going to take my time and concentration.  (More information on that later.)  At the time I saw Lynette's card, I didn't have this Beautiful Border stamp set from SU but one day I stumbled across it on eBay.  It makes such a wonderful quickie card and the nice thing about it is that you can add a sentiment for all kinds of occasions.  The sentiment is from a set of clear stamps in my stash.    Images were stamped using SU Perfect Plum or Eggplant Ink - it was made a couple of months ago and I don't remember which I used.  After stamping the border design I added the scored line on each side of it before I stamped the sentiment.

Thanks for stopping by!

Tuesday, September 28, 2010

POPCORN THE BEAR

One of our nephews has a little girl that is going to be 3 years old in a few days so I made this little card for her.  The teddy design is one of a series of "Popcorn the Bear" from Crafter's Companion and I purchased it from Joann.com. 

Thankfully I stamped the image on two cards.  I stamped with Memento Tuxedo Black ink.  On the first card I tried coloring the image with SU markers.  The coloring went fine on the flowers and little duck but the brown I used on the teddy was a little dark and it also streaked for me when coloring such a large area.

On the second card I chalked the teddy bear up with a light brown chalk and didn't even take care to avoid the stems and flowers.  To set the chalk I  put a piece of paper over the chalked image and used a brayer to roll over it firmly several times.  This helps to set the paper into the card stock.  Then I still colored the flowers with markers and the markers covered up the areas where chalk was on the flowers.

After finishing the above card, I took some dark chalk and went back over the first teddy and was surprised that it evened out the color on that one nicely so I was able to salvage it.

Thanks for stopping by!

Monday, September 27, 2010

ROSE NOTE CARD

My friend, Connie, loaned me the SU stamp that I used on the background of this card.  It makes such a beautiful suttle design that almost looks like designer paper.  I stamped it with the Hero Arts Soft Lilac Shadow Ink.  With such a large stamp, I inked it up and then put the card front on top of the stamp. The front of the card was slightly smaller than the stamp. I put a piece of typing paper on top so I wouldn't get my fingers all inky. I firmly rubbed around on the paper to get the ink transferred evenly.  As the ink dried it lightened up a bit which made it even more pretty.

The white strip was edged on both sides with a Martha Stewart punch.  I inked a small part of the large stamp again and after stamping it I used my Spellbinders Classic Scalloped Circle set to cut out a piece.  The small Rose which is stamped on the white card stock is from a retired SU set which has a flower for each month of the year.  I added this to the card using pop dots.

This was an easy card to make and I think it will make a nice feminine note card or birthday card for someone.  What do you think?

Thank you for stopping by!

Sunday, September 26, 2010

IN FLIGHT

This card was using a technique I haven't used for a while.  The butterfly stencil is from Dreamweavers.  I carefully masked it onto a piece of white card stock and stippled Stampin Up Lavender Lace and Pretty in Pink inks into the open areas.  (See how to make this below)  After letting the embossing paste dry over night I cut the rectangles using my Spellbinders Classic Scalloped rectangles.  The white around the butterfly needed to be softened a bit so I used the Tim Holtz tool to add the lavendar ink around the butterfly. 

Before adhering the matted design to the card, I ran the front of the card through my Cuttlebug using a Quickutz embossing folder.  The designer paper was a perfect color for the Pretty in Pink shade and is reversible so I was able to use the plain side as the rectangle mat and the striped side for the contrast. 

(TUTORIAL:  My friend, Lynette, posted a great tutorial on YouTube showing the entire procedure for doing this.  Click here to see: Using Embossing Paste   Two things I would mention: 
1.  Be sure to use removable tape when attaching the stencil as she mentions in the tutorial.  This will prevent tearing the cardstock when it is time to remove the tape.  
2.  In addition to the removable tape, I add masking around the entire piece with post -its since it gives even more protection to keep embossing paste off the main part of the card.)

Thanks for stopping by!

Friday, September 24, 2010

HAPPY TOGETHER

I recently got the Stampin Up "Happy Together" set and love these little birds.  I had also recently purchased this Sizzix embossing folder as a part of two-piece set from eBay Seller c**e**m.  The other folder is the one I used on the card I posted on September 20.

I love the embossing folder and how deeply it makes the pattern.  The stamp has the three little birds on it and I stamped it twice - lining them up using my Stamp-A-Ma-Jig.  The edge design was done with a Martha Stewart punch.  The birds were stamped with Close to Cocoa Ink and mounted on Close to Cocoa paper.

While I had the stamp set out, I decided to make a little different version of it. 

What do you think?  Thanks for coming by!

Thursday, September 23, 2010

USING TWO STAMPIN UP SETS

Today my goal was to use a stamp I've never used before.  I had never used my Stampin Up Forest Friends set and combined it with the Lovely as a Tree set.    The papers are from a 7 Gypsies Savanah paper pad.....something I haven't used for a long time.  The edge of the polka dot paper was punched with a Martha Stewart punch. 

This card made up very quickly and I like the result of the brown and black combination.

Tell me what you think............thanks for stopping by!

Wednesday, September 22, 2010

A LAUGH IS A SMILE

Monday I had a lady come to my home and I helped her with some new things for her to do with cards she makes. Spellbinders were new to her so I demonstrated a few things and she asked about making a "window" on the front of a card. I folded a piece of off white card stock and showed her just how simple it is. I put the piece aside.

Today I decided I wanted to use it before it lay on my table for too long. I ran the front through the Cuttlebug with the Swiss Dots folder. I then took the circle that had been cut out and stamped the image on it but ruined it. So I decided to just stamp it on the inside of the card and colored it with SU markers.

Using a Spellbinders Fancy Tag, I cut the off white piece for the sentiment at the bottom of the card and I traced the die onto the green paper for a piece slightly larger to frame it. The card still needed something so I cut a scalloped circle frame to go around the window.

(Correction: The shape at the bottom of the card is not one of the Fancy Tags. I used Labels 10.)

Do you think the two sentiments go together? I think I'd have been better off just stamping a floral design in the circled area.

Thanks for stopping by!

Tuesday, September 21, 2010

ANNIVERSARY CARD

My mother-in-law requested that I make her two anniversary cards so I made two like this for her.

The white card stock was run through the Cuttlebug using two different folders. I added two score lines between the designs but they don't show up very well in this picture.

The flower design from Inkadinkadoo was colored with an SU Real Red marker and a Memento Bamboo Leaves marker and stamped on a scrap piece of white card stock. I trimmed it and then mounted it on a piece of SU Wild Wasabi card stock.

I love it when you leave comments. Thank you for stopping by!

SIZZIX FOLDER

It appears I have sparked a lot of interest in the Sizzix embossing folder that I used on yesterday's card. I appreciate all the comments I received in emails and here on the blog. If you are interested in purchasing one, I bought this from a seller on eBay. It is actually a set of two great folders. The seller's screen name on eBay is "c**e**m". She has more than 10 available for sale. You can see the listing here: Sizzix Folders

Monday, September 20, 2010

A CARD IN A MINUTE

I purchased this Sizzix folder from a seller on eBay. It gives such a nice deep impression and I just love the design. I don't think I'll try to do anything further to it. If I try to color it I'll probably ruin it. (There is a little shadow on the card from one of the leaves on the plant behind it.)Thank you for stopping by! Hope you enjoyed this card which actually took less than a minute.

Sunday, September 19, 2010

DRY EMBOSSED CARD

Recently I was on the phone with a friend and she told me how she had made 100 cards over Labor Day Weekend. I delivered an order to her the next day and I got to see all of the wonderful cards she did using Lasting Impressions papers and stencils.
Cinda, if you see these pictures you will know I cased one of your cards. Thank you for the idea! These are colors I wouldn't have used if I hadn't seen yours but they are great for this time of year.
These two pictures are actually the very same card but I thought I would show how it would really work in either direction.
I haven't done any dry embossing for such a long time and Cinda really made me want to get out my stencils again. This card went together very quickly. The paper is from an 8 1/2 x 5 1/2 inch variety pack of paper from Lasting Impressions called "Indian Summer". (Today doesn't feel like Indian Summer though.)
I have lots of stencils and papers here to sell if anyone is interested in giving it a try. I always love hearing your comments. THANK YOU for stopping by!

Saturday, September 18, 2010

MORE OWLS

Another idea from SCS.......the brown "tree trunk and branch" is a piece of Chocolate Chip apper that was run through the Cuttlebug with the folder which has a wood grain to it. I cut out sections of it for the branch. The leaves are from two different Sizzix dies. Owls were done again with the SU Owl punch. I love these guys!

I didn't add a sentiment but could easily add a little oval with a something on it in the lower right corner.

Thanks for stopping by!

Friday, September 17, 2010

TULIP TIME

I know it is Fall and I should be doing FALL colors, but when I saw this idea on a card, I just had to make one.

The card base is white card stock from Papertrey Ink. The other papers are from my Lasting Impressions papers. Do you recognize the shape of the petals and the leaves? The punches are the "wing" part of the Stampin' Up Bird punch. How cool is that? It's so great when you can find multiple uses for the same punch or any tool! I just cut very narrow strips of the green paper for the stems but could have used the stem of the "branch" on that same punch.....just didn't notice that in time.

Thanks for stopping by!

Wednesday, September 15, 2010

IN MY THOUGHTS

I got the idea for this on SCS. My recent SU order included the owl punch. I loved the way she had made the two owls looking at each other. I had seen several cards made using it and thought it was kind of a fun way to make these little cuties.

The card base is a Bazzill variety pack of green papers. I cut the 8 1/2 x 11 inch paper into two 4 1/4 x 11 inch pieces and then folded it in half. The right edge of the front was cut down and then punched with the corner punch to make the scallops. I wanted the scallop to show so I inked the edge of the scallops with VersaColor Evergreen ink.

The owl bodies were punched using SU Chocolate Chip paper. Basic Grey papers from the "Origins" 6 x 6 paper pad were used for the dark green scalloped piece and for the rest of the pieces. Instead of trying to work with very tiny black punches for the eyes, I just used my Sharpie pen.

Other than the placement of the owls, I did make changes to the design that I had seen on SCS. There will definitely be more cards made with these.........I not only love the owls but have to make the punch pay for itself. :)

Thanks for stopping by!

((Note: I had actually intended this post to be for September 16 but accidentally hit the publish button before remembering to "schedule" it...........so just pretend. :) ))

NO STAMPING

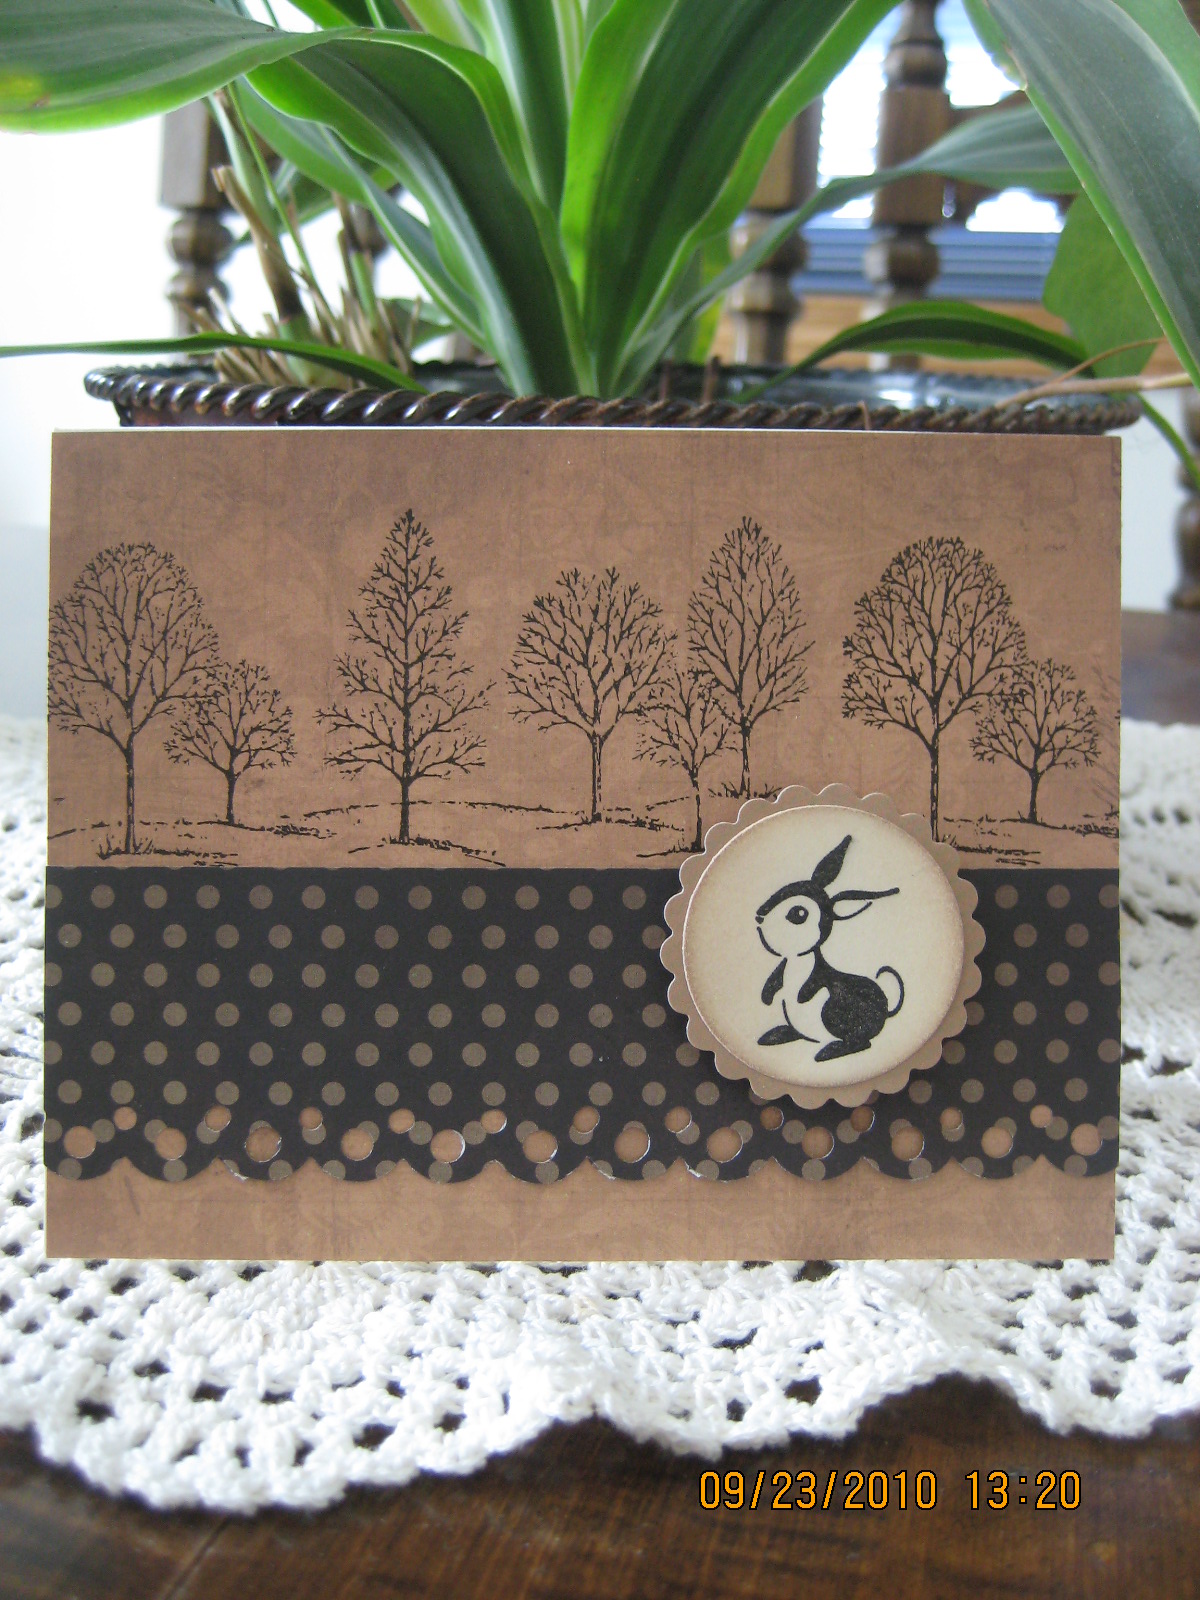
I recently ordered the Stampin' Up punch to make the bird and it arrived yesterday and I was eager to use it. The entire card is made using Basic Grey "Utopia" papers. The border across the top is one of the punch out borders in the back of the 6 x 6 paper pad. The card base is white.

The card should have been done in a matter of minutes but I think I spent most of the morning trying to figure out what papers to use and get it done.

Thank you for stopping by!

Tuesday, September 14, 2010

PENNY BLACK - SEASON'S CHEER

Today I received an order from Penny Black. Among the items were 12 of these sticker sheets. If you are interested in purchasing, they will be $2.00 a sheet plus shipping. They will make some beautiful holiday cards and would be great to have on hand for some of those last minute cards you decide to send. My email address is on the top right hand side of my blog page.

MAGNOLIA BIRTHDAY

Last summer (2009) when our Yahoo Group of ladies met in June, my friend (Andrea) shared all of her Magnolia stamps with us. I stamped off A BUNCH and have colored some but need to get more of them used. I'm not familiar with all their names, but I thought this little gal was so cute and it was fun to color. If I'd have had the actual stamp, I would have paper pieced her dress.

The design was colored with my Copic CIAO markers and then I added glitter to the pink parts of the birthday cake using a glue pen and Hero Arts Prima Glitter. It is very fine and adds such a nice sparkle to the card. (Let me know if you would like to order CIAO or Sketch markers as well as the glitter.)

The background paper is from Kasiercraft 6" paper pad "Utopia Collection". Very pretty papers in that pad. I used vellum for my flower with a tiny pearl in the center.

Thank you for stopping by!

Monday, September 13, 2010

ANNIVERSARY CARD

A few months ago I received a card with a die cut on it like this. The sender (Pam) was very kind and mailed the die to me to use and then return to her even though we have never met. I cut a few of these and then ended up finding a bargain for one on eBay so now I have my own.

The black frame and red heart are both from the same die and were in my basket of "pieces". I needed a card for my friend, Harriet and her husband, so I decided to use one of them.. The patterned paper is from a Kaisercraft paper pad. I believe the black and red are SU papers.

I am hoping that Harriet will receive the card before she sees the post here. I haven't had any time for several days to get new cards made and I didn't want to wait any longer to show something again. I wish I could post a new one every day but sometimes "LIFE" just has other plans. :)

Thanks for stopping by!

Wednesday, September 8, 2010

SURPRISE!!!!

Well, what started off to be an attempt to make an anniversary card turned into a very early Valentine card.

The red paper is from a Kaisesrcraft paper pad "Shaken Not Stirred" collection. I cut the piece to fit on a white card base. I doubt if you can see it but the red paper has a very nice shiney design on it. The two white hearts were cut with the Spellbindes dies. The two leafy branches were cut with a Sizzix die (I think from SU). Owls are from the SU "Animal Stories" stamp set. Little red hearts on the owls are from Hero Arts.

All went well to this point. I was hoping to find a tiny anniversary stamp in my stash of stamps -- no such luck. So I decided that I now have my first Valentine for 2011 done already.

(The tiny red hearts are something I can get for you through Hero Arts if you are interested. The package has red, two shades of pink and white hearts in it.)

Thanks for stopping by and seeing my accidental results. :)

Tuesday, September 7, 2010

COOL SHADOW CIAO MARKER

I was able to purchase this SU Hostess set for a great price at a stamp sale this summer. After I got it home I debated whether I really should have purchased it. Today I went to SCS and did some surfing through the gallery for cards using the set. There weren't many but I did find one that was the inspiration for making today's post. The one on SCS was a vertical card and had more to it, but I like the way this one turned out.

The designer paper is from the Papertrey "Everyday Blessings" 6 x 6 paper collection. I loved the papers in it and it was close to the SU Baja Breeze that was used on the sample I saw. After I started, I wondered if I'd be able to find a marker to match the color. It only took a second try to find that "BG10 Cool Shadow" matched it perfectly.

Because I wanted to add a snowflake under the semi-circle, I took a deep breath and decided to try inking up a clear stamp with a Copic maker. I wasn't sure if it would dry too fast or clean up but I proceeded. It worked just fine! The stamp cleaned up with a baby wipe. If it had been a darker color, I don't know if that would have worked as well. HOWEVER, the snowflake I experimented with wasn't quite the right size so I found another one that I stamped with Memento ink and then colored the image with the Cool Shadow marker. The layers were added with dimensionals.

A Martha Stewart snowflake punch was used on two of the corners and a rounder on the upper two corners.

Monday, September 6, 2010

POPPIES


Recently I got a great sale price on this Inkadinkadoo stamp on the Joanns.com web site. I colored it with Copic markers, cut it out with my Deckled Oval dies and then added the three olive green brads. The vertical strip was embossed with a Cuttlebug border and adhered to the white card base. Then I mounted the stamped layer on to the Classic Scalloped Oval and used dimensionals to put it on to the card.

I like the results, but I think I might have liked it a little better if I had embossed the white card base with Swiss Dots or something similar. Since I have more stamp offs of this design I'll probably try that on another one.

Thanks for stopping by!

Sunday, September 5, 2010

BABY GIRL

Today's image is another of the stamps from the SU set I won as a door prize last week at Michelle Zindorf's classes. It's a little hard to see but there is a scalloped layer of SU Wild Wasabi under the giraffe and on top of the SU Pretty in Pink scalloped layer. Designer paper is from Graphic 45 "Baby & Bride Collection". The letters look dark but they were stamped with SU Wild Wasabi ink.

Thanks for stopping by!

Saturday, September 4, 2010

THINKING OF YOU

My mother asked me to make a Thinking of You card for her to send to a friend. I had recently purchased this Grahic 45 "Bontanicabella Collection" paper. I used one side for the right hand portion of the card and the reverse side for the border piece which was cut using a border from PaperTrey. The burgundy paper used for the card base is some I had on hand. I'm not sure who makes the vertical stamp.

Thank you for stopping by! Hope you are having a fun Labor Day Weekend!

Friday, September 3, 2010

CLEARANCE ITEMS

I just finished posting a lot of Lasting Impressions stencils for Fall, Halloween, Winter and Christmas for $4.00 on this site: My WebStore Items

Also on that site are some Dreamweaver stencils at just over my cost and Spellbinders items just over my cost.

My inventory has gotten out of hand and I really am trying to clear out a lot of items. If you are accustomed to buying on eBay, WebStore works the same except I can take personal checks, money orders and guide Pay Pal payments to one of two accounts.

I'd like to see the WebStore site take off because there are no listing or final sale fees. It's good for the seller but just as safe for the person buying. Let me know if you have any questions.

SALE ON PENNY BLACK STAMPS

If you click on My Store link to Penny Black items, you will see five different sheets of Penny Black stamps. Two of them are whimsical hedgehog stickers and the other three are very pretty flowers. I normally sell these for $2.00 a sheet. These will be available for only $1.75 plus postage through September 30.

I am also beginning to clear out nearly all of my Lasting Impressions stencils and will be listing them here: My WebStore Items

You will find some Dreamweaver stencils there which I have not marked down as yet but I will be marking them down and adding more. There are also some Spellbinders items that I am greatly reducing in order to clear out inventory.

My only condition is that these will be paid for without any fees being deducted by pay pal since many are already listed at slightly under what my cost is. Let me know if you have any questions: vboddicker@aol.com

BIRTHDAY BLESSINGS

The idea for this card came from Splitcoaststampers. I made some slight changes in it. Cardstock is from Stamin Up! - Tempting Turquoise, Wild Wasabi and Chocolate Chip. Kraft paper is from Papertrey Ink. The sentiment is from Hero Arts.........flower from a bottle of flowers I bought too long ago to remember and had never opened.

The only thing I might have done different would be to have embossed the tempting turquoise to give a little more dimension.

Thank you for stopping by!

Thursday, September 2, 2010

"P" IS FOR PINK ELEPHANT (and more)

Our Yahoo group just had a card swap featuring the letter "P". I had just won the SU "Animal Stories" stamp set on Sunday at the class I took from Michelle Zindorf. When I saw the elephant I thought about a pink elephant.

The card was sent to my friend, Joanne. I thought I was doing so well telling her that P is for a Pink Elephant on Pretty in Pink Paper. I actually missed a couple.

Joanne is a real whiz at these things and told me that P is for Pink Pachyderm on Polka dot and Pretty in Pink Paper.

This was a fun card to make. I rarely make gatefold cards and it gave me a chance to use one of my magnets which have been sitting in a drawer.

Thanks for stopping by!

Wednesday, September 1, 2010

SEPTEMBER CALENDAR

The stamp is from SU "Lovely As A Tree". I sponged the leaves with four VersaColor inks: Canary, Topaz, Paprika and Raspberry. Brown and Evergreen inks were used for the trunk of the tree and grass. Fortunately I did two or three of these on scrap paper first becuase I had a hard time coming up with the right colors to show up right.

Thank you Lynette for these fun calendars to decorate each month!

SCALED DOWN BRAYER CARD

As I believe I mentioned earlier, most of the cards I make are the 4 1/4 x 5 1/2" size so I wanted to see if I could scale down one of the designs we made in the class with Michelle Zindorf. This is what I came up with. By not putting a reflection image that made the design much more adaptable to the A2 size.

When I stamped the tree, I didn't ink the grass portion with the black. Then I cleaned the stamp and stamped the grass portion with SU Wild Wasabi ink. The wolf was added and then I needed to finish off the bottom portion by sponging more of the Wild Wasabi so it didn't appear the wolf was floating in the air. With a marker, I added a few blades of grass around the wolf's feet.

I like this size and think I will be trying to make more brayered cards. I will probably be more limited in what I can do but I think I can still come up with some good scenes.

THANKS for looking!

This is the  video  I used to make this card using more retired dsp. After I finished, I was a little dissatisfied with the white background...