Wednesday, September 30, 2009

BACK TO HALLOWEEN

When I first got introduced to making greeting cards it was by dry embossing the papers with a white core and using brass stencils. I've gotten away from doing as much dry embossing because once I started needing sentiments for my cards, the stamps started rolling in and now stamping has overtaken my dry embossing.

I cased this card from a site but I honestly cannot remember where I saw it. The pumpkin design and papers were all from Lasting Impressions. This was a very easy card to do because the image was large, easy to cut out and assemble. Before cutting the images I scuffed the embossing to bring out the design.

Thank you for stopping by........comments are always welcome.......come back again soon!

Tuesday, September 29, 2009

MORE FALL LEAVES

I have so many punches and don't seem to use them nearly enough. Today I decided to get out a couple of punches that I have had and never used......these maple leaves and also some oak leaves which will be used later. The top and bottom edges are done with a MS punch which I have used several times. Squares were embossed with CB folders. Colored cardstock is from SU. "Autumn" was stamped with VersaMark and glittered with Egyptian Gold. The stamp is from Hero Arts.

Thanks for stopping by........come back again soon. and remember to check out my other blog pages. I have been adding some items slowly but surely to the "Clearance" page.

Monday, September 28, 2009

SPRIG OF PINE CONES

Recently I purchased the "Autumn Days" stamp set from my SU Demonstrator. The design stamped on the white layer is from that set. The pine sprig on the Wasabi green layer is from Hero Arts and then I used a MS edge punch.
The right edge of the card base looked rather plain so I took another small Hero Arts stamp that had a single pine cone on a pine sprig and stamped it several times along the right edge using VersaMark. Sorry I don't think that shows up on the picture but I discovered that if you double click on the picture you can see a much larger copy of the card and the VersaMark images show up nicely there.
After stamping the pine cone design, I cut the cream and green ovals using the same size of my Nestabilities oval set from Spellbinder dies and carefully edged the cream layer with the brown ink. Then I cut a slightly larger brown oval for the bottom layer and attached the entire piece using pop dots.
I think this will make a nice card for guys during the fall and winter months. Comments are always welcome! Thanks for stopping by and hope you come back again soon.

Sunday, September 27, 2009

BEWITCHING..........

This card takes little explanation. I got the printed double sided paper from Archivers. The stamped designs are Paper Inspirations stamps. I think one of the grandchildren will like it.....especially if I put a little money inside. :)

Saturday, September 26, 2009

HAUNTED HOUSE

Here is another Halloween card I have made for one of our grandchildren. The orange cardstock is Creamsicle Solid from Lasting Impressions. I stamped spider webs randomly on the card base. The two layers are also cardtock from Lasting Impressions. I stamped the haunted house with an unmounted red rubber stamp that I got from the Internet. I then punched a yellow moon and added some black bats to finish it off. Quick and easy but I think the kids will like it.

Please stop by again soon............

Friday, September 25, 2009

AUTUMN LEAVES

This made a simple card to assemble very quickly. I mistakenly ran the leaves through the Xyron upside down so these leaves have the embossing on the bottom but it still made a good card. This could be made for a Get Well or Birthday occasion at this time of year.

If you don't have a die for leaves and would like some pre-cut & embossesd in these colors, I would be happy to make some for you............$.10 each plus postage. The papers I used are SU are Wild Wasabi, YoYo Yellow and Pumpkin Pie. I can make these in other colors that I have in stock as well. Email me at vboddicker@aol.com

Thursday, September 24, 2009

BATS AND SPIDERS Die Cuts


Today's card is very easy. I used a CB Spider Web folder on the front of the card. The small spider was stamped with a rubber stamp and then cut with a small circle punch and attached to the card so it appeared to lowering itself from the web. Originally that design and the sentiment were the only two things I had on the card. Then today I added to die cut spiders which really helped to finish off the card.

Ordinarily I put items for sale on a separate blog page but this page might reach more people. The idea of offering them on eBay crossed my mind but by the time eBay took fees and pay pal took it's fees, I'm not sure if anything would be left.
I used a Cuttlebug die to cut these pieces and am offering 24 pieces for sale -- 12 Spiders and 12 Bats. The spiders measure 1 1/4" wide x 1 3/4" tall. The bats measure 2 5/8 inches across. If you are interested, let me know. You can check my email address by clicking on "My Profile". Selling price $2.00 plus $.75 to send them.
Thanks for looking!

Wednesday, September 23, 2009

IT'S TIME FOR HALLOWEEN

A little over a week ago I was in Minneapolis and stumbled into an Archivers at the Mall of America. Naturally I just had to go in and check it out. I found some great Halloween papers there which got me started on cards for our grandchildren. Over the next few days I will be sharing the ones I have made so far.

The patterned papers were purchased at Archivers, the solid orange, green layer and white cardstock is from Lasting Impressions. The stamped black cat is from Paper Inspirations and the sentiment is from Inky Antics.

I hadn't noticed it but a friend (Joanne) pointed out to me that the cat was looking up at the sentiment............let me assure you that was quite by accident. :)

Thanks for looking..........check back soon for more Halloween ideas.

Tuesday, September 22, 2009

ASKING FOR SUGGESTIONS TODAY

This is a card that I am posting for you to see but to ask for your suggestions. I loved this stamp. It is an unmounted red rubber stamp that I purchased at a very cheap price. It was so large though that none of the Oval Nesties were big enough so that I could cut it and still be able to put another mat behind it. I had purchased a Coluzzle set and it actually took the largest one of those to get the entire design in.

I inked each section with markers. After stamping the image I added some clear embossing powder to the pinecones and heat embossed them.

If you have any ideas I could use to enhance the card, please tell me..........I just think it could use something further.

Monday, September 21, 2009

GET WELL & INK PAD

Today's card is one that could also be made and by changing the sentiment used for various occasions. Cardstock is from Lasting Impressions and SU. I ran the front through the CB with one of the new folders. Stamped flower "Blush" is from Penny Black. The inks used are VersaColor and VersaFine.

Speaking of VersaFine ink...........I LOVE THIS INK. But I have an extra Onyx Black VersaFine pad which is still sealed. It is new. If you are interested, let me know.

Sunday, September 20, 2009

CHOOSE THE OCCASION


Today's card is one that I made so I can add the appropriate sentiment inside for whatever occasion pops up. The paper is from Lasting Impressions and for the background I used one of the new CB folders. Layers were cut and/or embossed using Spellbinder dies. The design was colored using COPIC MARKERS.
Thanks for stopping by!

Saturday, September 19, 2009

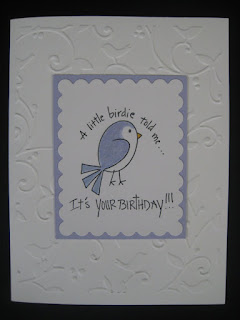
BIRTHDAY FOR A FRIEND

This image is from Whipper Snapper and makes a good card to give most anyone. Since the friend who always fixes my computer is having a birthday, we wanted to remember him on his special day. The CB folder I used makes a perfect background for the bird on the image.

Wednesday, September 16, 2009

HAPPY ANNIVERSARY, HARRIET!

A while back I saw a video on using alcohol inks. I thought it looked like a lot of fun and pretty easy to do. It's impossible to get two that look just a like so they all are unique. I did this process on white glossy paper and then heat embossed black EP over the top. The black layer is also glossy paper. Although it doesn't show up this is a gatefold card with a magnet closure. When I needed an anniversary card for my friend, Harriet, I wrote an appropriate message inside.

If you are interested in trying alcohol inks, I would be happy to get them for you at a discount.

Thanks for looking and hope you come back soon.

Tuesday, September 15, 2009

HELLO

Today's card is pretty simple. The papers are from a Making Memories paper pad and the border print across the middle is a "paper ribbon" which coordinates with the papers in the pad. The flower and leaves are embossed using a stencil from Lasting Impressions and the "hello" is a Cuttlebug die cut.
Today's card is nothing too original. The papers are from a pad from Making Memories - the border in the middle is a "paper ribbon" which coordinates with the papers in the pad. The flower and leaves are dry embossed with a Lasting Impressions stencil and the "hello" is a Cuttlebug die.

Wednesday, September 9, 2009

WEDDING CARD

I have a nephew getting married September 12 and wanted to make something special for them. (Sharon, if you see this don't tell Chris you saw the card for his and Mandy's wedding.) Originally I wanted to use one of the new Spellbinders Pendants but turns out I sold the one I wanted to use. I went through my files and found the picture of one I had from somewhere on the Internet. I used the combination of Spellbinders Classic Ovals rather than circles as the one I had seen. The light pink background is a border stamp I stamped twice before mounting the layered ovals. I had also planned on using some sheer ribbon along the left side of the card but then decided it might make it look a little "too girly" since it was already "pink". I remembered the CB "with love" border folder and used it instead - since it was a family member getting married it seemed more appropriate.

The pearls really make a perfect addition to the scallops for such a special occasion and since the card won't go through the mail it should be fine.

Thanks for looking! Your comments are always welcome and appreciated.

SYMPATHY

Tuesday, September 8, 2009

TWO BIRTHDAY


These are two cards I made using my Swirls CB folder and a stamp set from SU. These were made before I bought my Scor-Pal which has become a necessity. If I do these again, I would add a scored line along the CB edge to give it a little more of a finished look.
Cardstock (Powdered Sugar) is from Lasting Impressions.

Monday, September 7, 2009

SU FROM THE GARDEN


These are two cards I made using the SU "From the Garden" stamp. I saw someone's card one time and fell in love with this beautiful stgamp. Not sure I did it justice but I did the cards using SU paper and inks. I had some vellum paper with the butterflies on it and but them out to add a little color.

Thursday, September 3, 2009

HEARTFELT SYMPATHY


With a nice border stamp (this one from The Stamp Barn) and a sentiment that is good for horizonal cards, it can be simple but pretty to make a card for several different occasions. I have used this for birthday and sympathy -- but if you had another sentiment that fills the space nicely you could use it for other times as well.
The main cardstock is an off white but has speckles in it which gives the card a richer look.

Tuesday, September 1, 2009

BAPTISM CARD

This is a card I made in 2008 on the occasion of our youngest granddaughter's baptism. The main card was made with Snickerdoodle card stock from Lasting Impressions. I stamped the Penny Black rose on the front. Then I made a vellum layer to go over the front and heat embossed the sentiment with Egyptian Gold embossing powder. The edge was cut with one of my MS punches. A sheer pink ribbon was the final touch.

This is the  video  I used to make this card using more retired dsp. After I finished, I was a little dissatisfied with the white background...