Friday, February 28, 2014

HAPPY BIRTHDAY, SWEET MAGGIE!


One of my nephews has a little girl named Maggie who will celebrate her very first birthday on Sunday, March 2.  Before mailing her card earlier this week, I almost forgot to take a picture of it.  The card is very simple.  She is probably too small to know anything about Mickey Mouse, but I think her brother who is a little bit bigger will enjoy it too.
 
I've had the dp for a long time and decided it was time to use some of it along with the Mickey Mouse sticker.
 
Thanks for coming by!

Tuesday, February 18, 2014

BACKYARD BASICS - Bird


I discovered that I had a card made up ready to post on my blog.  

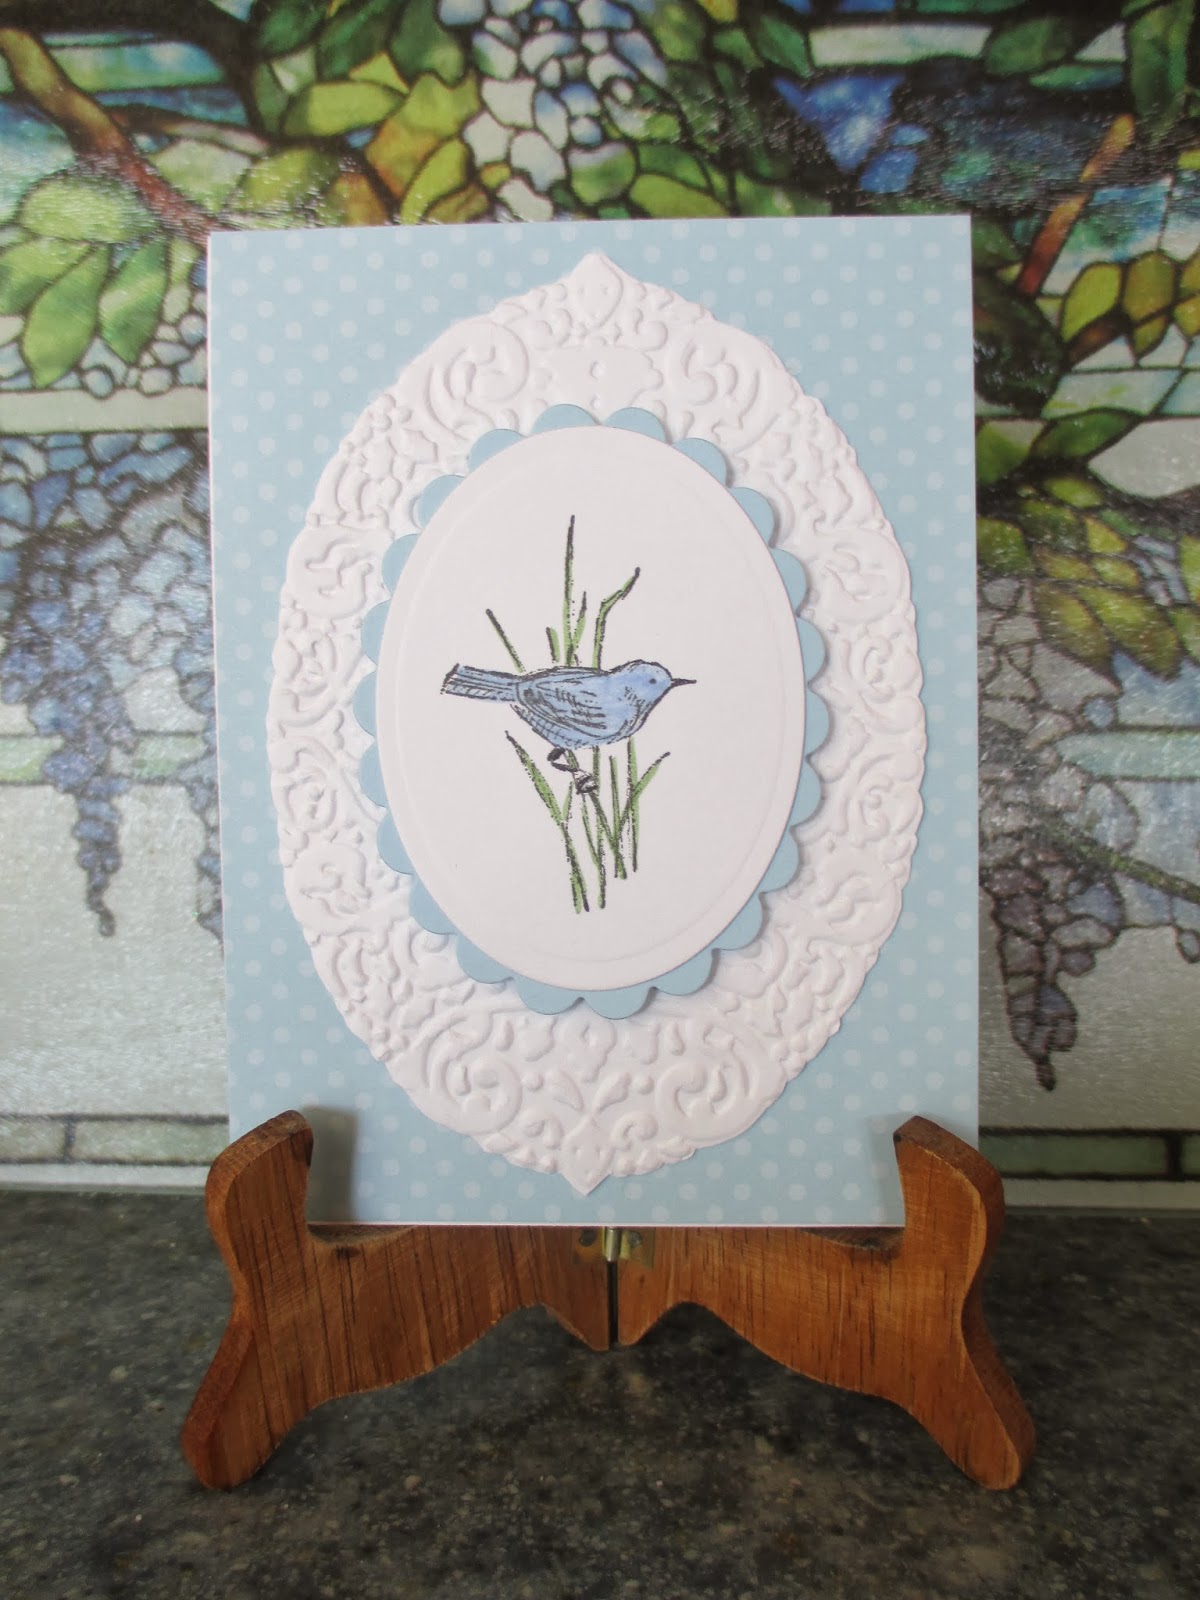
While I had the Backyard Basics stamp/die sets out, I made several cards using the designs.  For this card I colored the stamped design with SU Bashful Blue and Wild Wasabi.  The image was then cut out and embossed with one of the Spellbinders Classic Ovals.  That piece was then added to a Bashful Blue mat which had been cut with one of the Spellbinders Classic Scallop Ovals.  

I ran a piece of white card stock through the Cuttlebug using the SU Holiday Frame folder and then carefully cut it out because I wanted to mount everything onto a piece of dotted Bashful Blue dp.  

If you want any of the SU products that I show on my blog here, be sure to let me know and I'll be more than happy to help you.

Now I'm off to work on more taxes..............I'll be back later.

Monday, February 17, 2014

TIME FOR A BREAK

A few days ago I mentioned that posts might be a little irregular because I was going to be dealing with our daughter's tax return, my mother's tax return and, of course, OURS .  Well, that time has now come.  
 
I managed to file my Sales Tax Return on time January 31.  Last week I was able to complete and e-file our daughter/husband's federal return and print off their state return.
 
Today it is time that I start working on information for my mother and then the dreaded task of going through all of our receipts, bank statements, etc.
 
I may need a break from all of this "fun" so I hope to at the very least 1 card this week.  Stay tuned..............

Friday, February 14, 2014

PPA 191 Color Challenge


I rarely have used Pumpkin Pie as the main color for a card, but decided to give it a try for this challenge.  My card base was embossed with the Cuttlebug Swiss Dots embossing foler to coordinate with the dotted Pumpkin Pie dp.  Before adding the dotted dp to the card, I cut one of the Tea Lace Doilies in half and then cut one of the halves in half again.  I sponged the 1/4 pieces with the Pumpkin Pie ink and added them to the back side of the dp.
 
The flowers and bird are from the Stampin' Up! Backyard Basics stamp and die sets.
 
You can sell all of the cards posted for the PPA 191 Color Challenge here:  PPA 191.

HAPPY VALENTINE'S DAY!

 
After I posted several Valentines I had made for this year, I made two additional ones...........one for a very special friend and one for my mother.  I was very pleased with both of them but unfortunately I forgot to take a picture of them before dropping them in the mail!

So I thought I would pull out one of the cards I made for a past Valentine's Day.  It just didn't seem right to post anything else today.  Some of you may have seen it before but hope you will enjoy seeing it again. 

Thank you for stopping by!

Wednesday, February 12, 2014

BACKYARD BASICS - Butterfly #2


Using the same stamp/die set as yesterday, I decided to show you a card more like the one I saw on Pinterest.  I didn't want to case it exactly so I chose a different color.  I also chose a different sentiment and stamped it at the top of the card instead of at the bottom.
 
Tomorrow I'll have something different for you so I hope you will stop.  I love hearing from you so your comments are always appreciated.

Tuesday, February 11, 2014

BACKYARD BASICS - Butterfly

 
As you probably have read here before and seen on many of my cards, I LOVE butterflies.  This is another card inspired by looking at Pinterst.  My basic idea came from a card I saw there but my arrangement of the butterflies is different.  I cut the butterfly shapes in the white card stock first and stamped the "thinking of you" below the shapes.
 
The white layer was then embossed with the Swiss Dots folder and layered onto a piece of SU Bashful Blue cardstock.  The butterflies were stamped onto a piece of Bashful Blue dp.  I added glue just to the very center of the pieces and placed them on top of the solid blue areas that were showing through the top layer.  All of this was then added to the white card base.
 
 The side view of the card shows how I flicked the wings of the butterflies to give more of an appearance of being in flight.  I think this is a card that can be used for several different occasions.
 
Thank you for stopping by!


Monday, February 10, 2014

BACKYARD BASICS


I can't take credit for the layout and idea for this card.   Ann Schach (The Stampin' Schach) recently showed a card on her blog that was made with this layout.  You can see Ann's card here.

Ann had trimmed the floral design by hand but I didn't have the patience to do such fine cutting.  So I decided to pull out the Backyard Basics stamp and die sets to give the same affect but with less stress. 
 
The base of the card is Baja Breeze card stock.  I then cut a piece of white card stock which was slightly smaller than the front of the card and ran it through the Cuttlebug using SU Square Lattice embossing folder.  One of the White Tea Lace doilies was cut in half and then sponged with Baja Breeze ink.  A strip of Baja Breeze dp was cut and shaped like a banner. 
 
A white oval was sponged with Baja Breeze ink.  The next step was stamping the design and coloring it with Baja Breeze and Wild Wasabi markers.  To finish the design, I sponged ink over the areas of the die cut which were white so that the image blended in with the color of the oval.
 
I really like the layout of this card and will surely use it again using other colors.  Thank you for stopping by!!!

Friday, February 7, 2014

HAPPY BIRTHDAY, TUCKER

 
 Today I want to show you the card I made for our favorite Grandson............OK, I can say that because he is our ONLY Grandson.  You may remember that this past November we took our whole family to Disneyworld.  When we went to Disney Downtown, Tucker had the best time at Lego World.  Tucker and his Grandpa (my husband) spent a long time building a little car and racing it on a little track they had there.  Such great quality time together!
 
I had a card ready to send when I suddenly remembered these Lego stickers.  The stickers were something that I thought I had to have after I saw a card made by my friend, Georgia.  As I so often do, I put them in the drawer with all of my other stickers and forgot about them.  I'm so glad I did because this was really the perfect time to use them on a card for Tucker.
 
I have a niece who has two little boys and a nephew who has a little boy so I went ahead and made up three more cards with the stickers that were left.  Otherswise I have a feeling the rest of them would have been left in that sticker drawer and never gotten used.  Here are the other three cards I put together for them.


HAPPY WATERCOLOR #5


I decided to make one more card with this stamp set and giving a watercolor type of look to the background for the flowers.  The colors I used are Pistachio Pudding, Crisp Cantelope and Costal Cabana from the 2013-2015 In Colors.
 
Since these colors are more pastel, I decided not to stamp the floral stem and sentiment with black but instead used Baked Brown Sugar also from the new In Colors.
 
The punch I used for the corners is from Stampin' Up!  The white layer was then added to the Costal Cabana card base.  Very simple card - quick and easy!
 
Now watch for the second post for today................

Thursday, February 6, 2014

HAPPY WATERCOLOR #4


Not too long ago I saw someone's card using this Spellbinder's Diamond Effects die set.  I received it recently and decided to give it a try on this card. 
 
The base is Stampin' Up! Pacific Point card stock.  I cut the largest background with white card stock.  Then a second layer was cut with the Pacific Point.  A white oval die is included in the set so I cut that one to use for the floral design.
 
I tried coloring one of the floral designs using the Pacific Point marker but it was a little too dark and covered the detail of the flowers.  Instead I used a Copic marker but then used the Wild Wasabi marker for the leaves and stems.  The flowers are a little brighter than I wanted but the next time I am going to try the Copic Peacock Blue and see if that might be better.  
 
I think this is a die that I will be able to use frequently......at least I hope I do.  Tomorrow I'll have more than one post for you......one Stampin' Up! and a second one for a special someone.  Is that enough tease for you to come back?
 
Thank you for stopping by today!

Wednesday, February 5, 2014

HAPPY WATERCOLOR #3

 
The card base is Stampin' Up! Crushed Curry card stock.  I edged the front of the card with one of the Cuttlebug border embossing folder from the Organic Flourish set of five and then scored lines were placed on each side of the embossing.
 
The white piece was trimmed down so it would fit nicely in the remaining space.  I took a sponge and added Crushed Curry ink in the area where I would stamp the flowers.  I shaded the background slightly by beginning at the top and swirling the ink down to the bottom.   As I added additional ink, I always started at the top and gradually shaded downward.
 
Next I stamped the floral design with Memento Tuxedo Black ink.  Crushed Curry butterflies were punched and added along with tiny pearls.  The "Happy Birthday" vertical stamp is from Darcie's.
 
Hope you'll be back tomorrow........but thank you so much for stopping by today!

Tuesday, February 4, 2014

HAPPY WATERCOLOR #2

 
I've been having so much fun playing with this particular stamp from the Stampin' Up! Happy Watercolor set that I will be posting cards that I made yesterday for the rest of the week.
 
For this one I chose Melon Mambo ink and stamped the background once and then stamped it off two more times.   The flower and the sentiment were stamped using VersaFine Onyx Black ink.  The sentiment from Paper Inspirations is one I've had for a long time.
 
The butterflies were punched with a Martha Stewart punch that has three butterflies on it.  Then I added SU pearls to them. 
 
Be sure to stop back each day this week for more samples using the same stamp.  Thank you for stopping by today.

Monday, February 3, 2014

HAPPY WATERCOLOR


One of the new Stampin' Up! stamp sets is Happy Watercolor.  I used one of the stamps from the set to stamp the colored backgrounds.  The colors I used are Primrose Petals, Summer Starfruit and Gumball Green.  I applied each of the colors to the stamp and then spritzed with water before applying it to the paper.  After the colors were dry, I inked the dots and stamped them over the appropriate colors.  I purposely stamped some of the dots to show on the white card stock.
 
Then I stamped the floral design using VersaFine Onyx Black ink.  When I was preparing the layers to add to the card base, I accidentally got a little water on the white layer.  Since it showed, I added a little butterfly dimensional sticker on top of the smudge.
 
I have more ideas for this stamp set, so I'm sure you'll be seeing it again.  If it is a set you think you would like, let me know and I'll order it for you. 
 
Thank you for stopping by today!

Two more cards using the "All About Autumn" retired dsp. Thank you for coming by today!