Friday, January 29, 2016

BUSY, BUSY SCHEDULE

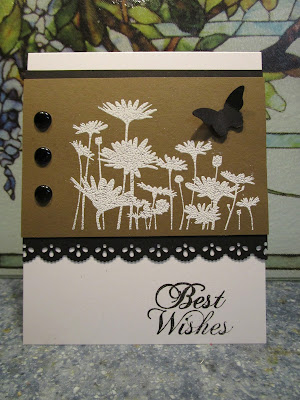
I'm sorry to say there will be no card today.  If you saw my post yesterday, you saw the "reservation" card that we made for tables at a Hot Stove Banquet tonight.  I had 5 of them to finish off this morning and was extremely careful not to spoil any because my daughter would not be able to get the letting done again in time.  

Wouldn't you know I still had one thing happen that made me hold my breath.  I used Copic markers to color the designs and my red marker started running out of ink!!!!!  Fortunately I had another marker the same color to finish the job.  You may not know it but Copic markers might be difficult to find right now.  My distributor is only getting only about 10% of the ones they want and I saw another Internet site that must be having the same problem.

The week has been very busy!!!  My husband has had me doing some things helping him to prepare for this banquet.  There were 22 signs to make (double sided) and 18 place cards for the 2 VIP tables.  He needed labels for the silent auctions and help putting things in the large basket of baseball items for the door prize.

As if we weren't busy enough, both of us were also dealing with insurance situations, financial matters and other things for our elderly mothers (93 and 96)..........making phone calls and dealing with paperwork.  

I was hoping to get something made for today, but I finally just burned out!  I'll concentrate on next week.  It sounds like we are going to be in for some weather on Sunday and possibly a REALLY BIG snowstorm on Tuesday so I should have time to make some cards again.

HAVE A GREAT WEEKEND!

Thursday, January 28, 2016

A BASEBALL PROJECT


The local baseball diamond was recently deeded back to our town from the school.  A baseball association has been formed and they are in the process of fund raising to make improvements there. The diamond is what we locals refer to as "the REAL Field of Dream" because we actually had several great baseball players go on to play minor and major league baseball.......including Bruce Kimm and Mike Boddicker.  Mike was actually the Most Valuable Player the year the Baltimore Orioles won the World Series.  You have to understand that at the time our high school baseball teams won 20 State Championships we had only about 100 kids in the entire high school so having the number of players go on to the minor and major leagues was very special!!!

Enough bragging.........the baseball association is having a "Hot Stove Banquet" tomorrow night and some individual families and business bought tickets for an entire table.  Those tables will have reservation signs on their tables.  My daughter cut letters with her Cricut for all of the signs (double sided) and I used two old Stampin' Up!  baseball sets to decorate them.  This is the one that will sit on the table for a local business.

Thanks for stopping by!

Wednesday, January 27, 2016

HAPPY BIRTHDAY, JENNIFER


Today our oldest daughter is celebrating one of the anniversaries of her 29th birthday.  (This has become a standard joke about her age.)  This is not the card we are giving her but I did want to post a birthday card today.

I have so much SU dp and just need to start using it instead of hoarding it.  There is always something new coming out that I need (want) and some of the hoard just has to go!  This is one of the very first dp papers I got from Stampin' Up!.  The Martha Stewart punch provided a nice border between the dp and SU Marina Mist card stock..  Butterfly is from the Spellbinders "Wonderful Wings" die set.  The layout is certainly one that can be used for many different occasions.

Thank you for stopping by!

Tuesday, January 26, 2016

BLUE AND GRAY COLOR SWAP


Our Yahoo group's color swap this month was to use gray and light blue on a card.  I pulled out my SU Gorgeous Grunge set and it made the card easy to do.  I used a Spellbinders die to cut the butterfly with Marina Mist card stock.  I also had coordinating "dots" to use and added three.

Thank you for stopping by today!

Monday, January 25, 2016

STAMPIN' UP! - A Cherry on Top DP


The dp used on this card is from an SU paper pad.  I wanted a card that would work for young, old, male or female.  A die from a Penny Black set matched the shape on the dp so I cut three with coordinating papers from the same pad.  I had a narrow strip of the green dp so added it behind the layer with the balloons.

I made up a kit of three additional cards in a similar layout for my young helper.  Since I wanted to get the card kits to my helper ASAP, I cut some white card stock to 4 x 5 1/4 and stamped designs on them for her to color.  I'll mount the colored images on appropriate dp when I get them back from her.  Friday I delivered the 9 card kits and 9 stamped designs to her and told her to have fun.  She is such a sweet girl!!!

Thank you for stopping by today!

Friday, January 22, 2016

SYMPATHY CARD #2


I had a piece of the Wild Wasabi dotted paper left from yesterday's card so I changed up the layout on this one and used the flower from the SU "Love & Sympathy" stamp set instead of the three little flowers.  I really like the soft pink blossom along with the two green colors.

Thank you for stopping by today!  Have a great weekend!

Thursday, January 21, 2016

CASING A SYMPATHY CARD #1


I'm not sure why, but I rarely have sympathy cards made up ahead of time.  Somehow to me it feels wrong to have them waiting for someone to pass.  I found a need to have two cards for people who passed away recently.  Because I was in a hurry to get one made, I turned to Pinterest and fell in love with a card I saw.  I believe I used the same colors.  The main difference in mine is that I didn't add a white ribbon and bow across where the two colors meet.  I tend to keep my cards pretty streamlined.  

The same papers will appear on the second sympathy card I made tomorrow so I hope you will come back and visit again.  Have a great day!

Wednesday, January 20, 2016

ANOTHER SPRINKLES OF LIFE


This is a really fun stamp set to work with.  You can make ice cream cones, ice cream sundaes and trees with various toppers.  I found a card very similar to this on Pinterest and decided to use it as a second card kit for my "helper" in making birthday cards for the care center.  The sentiment on the front is perfect to use with the cute little red birds.

Thank you for stopping by today!

Tuesday, January 19, 2016

STAMPIN' UP! - Sprinkles of Life


When I worked with the religious education students holiday cards for residents of a local care center, I met a lovely young lady who I've been told is quite an artist.  She seemed to really enjoy making cards so i have recruited her to help with making birthday cards for the care center to hand out as a resident celebrates a birthday.

I made up this card as a sample for her and then cut the additional pieces and gave her three "kits" to put together for me.  Another card will be on my blog tomorrow which I have made into kits for her to do.  It is so fun to have found a young person who is interested in helping with this project.  

Thank you for coming by today!

Monday, January 18, 2016

PP278: A Clean-and-Simple Challenge


This week the challenge is a CAS Valentine.  I hadn't started anything for Valentine's Day yet but was thinking about what I would make.  Last week I received my first Memory Box Distressed die set (something I had told myself I was NOT going to buy....look how well that worked!).  The Memory Box die set is "Distressed Windham Collage".


Saturday I had cut a couple pieces with two of the dies that are in the set and left them laying on my craft table.  Yesterday when I saw the challenge for this week, I decided this would be a great diecut to use over SU Real Red card stock.  The small hearts were cut with an SU punch and the large one was made with a Marvy punch.


I think this meets the criteria for a CAS Valentine.  If I make multiples for the care center, this will be a quick and easy one to do.

Thank you for stopping by today!

Friday, January 15, 2016

ALL OCCASION CARD


I have cards lined up for next week, but nothing scheduled ahead for today so I pulled out one more of my Stampin' Up! Upsy Daisy cards that I made last week.  The color used on this card is SU Rich Razzleberry.  Instead of tiny pearls, I added three tiny dots to the butterfly with my white gel pen.

I hope you have a great weekend wherever you are.  Ours is going to be VERY COLD!   One of our granddaughters is going to be performing in an Honor Band Saturday evening and it is going to mean bundling up really well with temperatures in the single digit.  It is such an honor for her to be chosen for the third time to do this and we want to support her talent.  Right now the high temperature for Sunday is predicted to be -1 degree!!!  I don't think I'll be going anywhere.

Thank you for coming by today!

Thursday, January 14, 2016

MEMORY BOX BUTTERFLY #2


I had to consider what I was going to use as the mat to put this butterfly onto.  The patterned paper was busy enough and didn't coordinate well with any of the other card stock I had.  Since the outline is white, I took a 4 1/4" x 5 1/2" piece of white card stock, embossed it and then attached it to the main card base.  The butterfly does stand out enough on the white background.  I am much happier with this card than I was with the one I posted yesterday.

Which would you choose?  Thanks for coming by today!

Wednesday, January 13, 2016

MEMORY BOX BUTTERFLY


I'll start off right away by saying that this didn't turn out quite like I had hoped.  I've had a bunch of these butterflies waiting to "fly" onto a card so I decided to pull out a couple.  You will see one again tomorrow.

The beautiful patterned paper behind the gold outline is from a pack of Oragami papers that I have had for several years.  One of the colors on the butterfly matches very well to the Stampin' Up! Baja Breeze papers.......although it doesn't look as good in the picture.

Once I had the butterfly on the card, I added the three gold metal pieces and the upper right corner needed something.  I stamped the tiny Happy Birthday and wish I had left it alone.  It didn't stamp as dark as I had hoped.    And then I had this narrow strip of the Oragami paper and decided to add it to the left side.  Not sure if that was a good idea either because it is awfully close to the little sentiment.

So......if you have any suggestions or ideas about this card, let me know.  I'm not sure there is anything I can do at this point to improve it though.  Thanks for stopping by!


Tuesday, January 12, 2016

HERO ARTS - Butterfly Bookmark Stamp


I've had this stamp for a long time and haven't used it much, but I love the design.  I stamped it on the white card stock using Memento Tuxedo Black Ink so that I could color the image using Copic markers..  The wood mounted stamp has a colored image on the top so I simply colored it the way it is shown on the wood block.  I used the blender pen to remove a small amount of the dark purple on the wings and then you the Wink of Stella Brush to add some clear sparkle in that area.  A white gel pen provided the white dots.  

While I had these supplies on my table, I made a second card just like it.  At one time I considered selling this stamp, but I think I'm going to hold on to it yet for a while.

Your comments are always welcome and appreciated.  Thank you for stopping by today!  

Monday, January 11, 2016

A WINTER SCENE


At first glance this image looks like it was placed behind a die cut window.  Actually I stamped the image, cut it apart and then mounted the image on a black mat leaving the spaces between the pieces.  Other than that it is a very simple card.  I used this card last week for a card swap.

Thank you for stopping by today!

Friday, January 8, 2016

STAMPIN' UP! - Upsy Daisy #7


I love the Stampin' Up! Marina Mist color.  I double stamped the image.  The dp is from one of the SU paper pads.  The embossing at the top was done with a Textured Impressions folder from SU.

After seeing the picture I had taken, I noticed that the layer was not straight on the card and was able to remove it and put it on so that it is straight now.  In the interest of getting this post scheduled, I decided to just post the picture anyway before fixing it.

I have other Upsy Daisy pieces stamped which will probably show up here eventually but I'll try to get something new ready for next week.

Thank you for stopping by!

Thursday, January 7, 2016

STAMPIN' UP! - Upsy Daisy #5 & #6


Card #5

This card is pretty close to the same layout as one I saw on Pinterest.  I did change the dp used.....I left off the three accents at the top......and I changed the sentiment.  The size of the partial circle is smaller too.


Card #6

I decided to change the direction of the card to a horizontal top fold.  I arranged it the same but added the sentiment in the black open area.  I actually did use my Stamp-A-Ma-Jig to stamp the "Happy Birthday" and somehow I still managed to not get it perfectly straight!

So the week is about over but I'll have one more day of Upsy Daisy.  It makes me wonder why I haven't used this stamp a lot more.  I realized that even if this set gets sold, I can still do something very similar using other stamps.

What do you think about today's cards?  I love hearing from you!!!  Thank you for coming by!

Wednesday, January 6, 2016

STAMPIN' UP! - Upsy Daisy - #3 & #4


Card #3

Once again Pinterest was my inspiration for this card.  I saw a sample of one almost exactly like this.  The image was stamped with SU Craft White ink and then heat embossed with opaque white powder.  I used just a strip of ribbon that I ran through the Xyron to get it to stick.  The punched black border at the bottom is a different design.  My sentiment is for a birthday.  Very minor changes but it got me started.


Card #4

I had stamped two of the designs on SU Soft Sude card stock and one was a little further to the right so I placed 3 larger black metal "sprinkles from "doodlebug design inc." along the left side.  I raised the design higher on the card and used a larger sentiment at the bottom.  

I really like this color combination. What do you think?  I love hearing from you and appreciate any comments you leave.  Thank you for stopping by!

Tuesday, January 5, 2016

STAMPIN' UP! - Upsy Daisy #2


Yesteray I stamped the Upsy Daisy Design several times and used different colors.  This is another card I did yesterday using it in black on a masked butterfly design.  This butterfly was also from the Spellbinders Wonderful Wings die set. The sponging was once again done with Baja Breeze and More Mustard.  

Since I don't have anything else made up right now and sinceI have more pieces that I stamped with this design, I will probably be posting them for the rest of the week..  

Thank you for stopping by again today!

Monday, January 4, 2016

WELCOME 2016!!!

HAPPY NEW YEAR, EVERYONE!

On Sunday, December 27th we had our family Christmas get together.  It was wonderful having the whole family there.....including both of our mothers (ages 93 and 95) and both of our daughters' families.  That night the two youngest grandchildren stayed with us until Wednesday afternoon.  Later that day their oldest sister came to stay with us for one night.  How special to have a 17 year old granddaughter still enjoy coming to spend time with us.  It was a lot of fun but tiring.

Due to the busy schedule we had last week, I found myself needing a "vacation" from posting on my blog.  It seemed that the holidays had caught up with me and I developed a cold and was really tired.  I spent very little time on the computer and absolutely no time stamping.

But now I am going to try to get back in the swing of things and have some new cards for you to see.  


I thought I had the Spellbinders Nested Buttterflies, but I guess I must have sold them.  (Isn't that the way it happens?  When you decide to get rid of an item then you discover you wish you had kept it.)  The die I used for this design is from Spellbinders but is one of the Grand Shapabilities Wonderful Wings set.

I cut a piece to use as a mask and then put it over a piece of white card stock.  The sponging was done with SU Baja Breeze and SU More Mustard.  While the mask was still in place, I stamped the SU Upsy Daisy stamp with VersaFine Onyx Black ink.  The mask was a light weight card stock but still prevented the image from stamping clear to the edges of the butterfly so I added some black with a black marker.   To do this type of image again, I would cut a second mask of the same die using typing paper which would be much thinner.

I've always loved cards done this way but have rarely done one myself.  I hope you like the card and give this a try.  Thank you for coming by today!

Two more cards using the "All About Autumn" retired dsp. Thank you for coming by today!