Friday, November 29, 2013

WITH HEARTFELT SYMPATHY

 
Pinterest is such a great place for me to get started making a card.  The general idea for this card was one I found there. 
 
The card I saw on Pinterest did not have the leaves colored in so I stamped the leaves in Old Olive and finished the card by coloring in the berries and stamping a sentiment in the upper right corner.   After my first attempt, I decided I wanted a little more color so I stamped the outline with Memento Tuxedo Black and then colored in the leaves with Wild Wasabi and Real Red for the berries.  For the matting, I used the same color that I had used on the leaves.  The sentiment is from that same stamp set.
 
 
Simply Sketched - Item #129672
(email me if this is a set you would like to order)

Hope you had a great Thanksgiving Day!!!  If you are participating in any of the Black Friday shopping, good luck finding some good deals.  As for me, I woudn't even consider joining in on the madness but if I find any Black Friday bargains they will definitely be on line.

Thank you for stopping by!

Thursday, November 28, 2013

HAPPY THANKSGIVING!!!!


No card today...........I hope all of you are spending time with family and or friends.  Today is a time for all of us to think about all of the people (and things) for which we are thankful.  Please enjoy your day and if you are traveling, I pray you all stay safe!

Wednesday, November 27, 2013

SIMPLE NOTE CARDS


One thing I have in my "stash" is a package of pre-scored blank note cards with envelopes.  While I had the Stampin' Up Stippled Blossom stamp set out I decided I would make up a bunch of note cards using the same flower that I had used on the card posted yesterday.  I used various sentiments on the fronts and used a variety of colors.  These are just three.   
 
While I like the colored ones the best, the third one shown has kind of an interesting look to it too.  The Stippled Blossoms stamp set is available and if you would like me to order it for you, I'd be happy to do that.


Tuesday, November 26, 2013

HAPPY BIRTHDAY, HARRIET!


My friend, Harriet, had a birthday this past Sunday and I sent one like this to her except I'm pretty sure her card had "Birthday Wishes" as the sentiment on the front of the card.
 
The picture makes the flower look more orange than it should because I believe I used Calypso Coral papers and ink and also Pistaschio Pudding ink for the leaves.  The stamp set I used is Stampin' Up's Stippled Blossoms.  This was a set I didn't think I wanted, but when I signed up to sell SU products, it was on my first order.  I'm so glad I have it. 
 
I was having so much fun with this two-step set that I also made some very simple note cards with the set that I will show tomorrow. 
 
Thank you for stopping by!


Monday, November 25, 2013

FOR A VERY DEAR FRIEND


This card was made using the Stampin' Up! "Too Kind" stamp set.  I love this two-step procedure.  I had seen a card on Pinterest that gave me the idea to sponge green over the stems as if the flowers blowing in the wind on a hill.  The rest of the background was lightly sponged with a light blue ink (either Baja Breeze or Bashful Blue).  The other inks and papers used on the card were Wild Wasabi, Crisp Cantelope and Calypso Coral.
 
Thank you for stopping by!

Friday, November 22, 2013

STAMPIN' UP! - Thinlits Label Die


As soon as I saw the circle and label thinlits, I knew I was going to want them.  I had seen various "flip" cards but these dies make it SO easy!  I previously posted another card made with this die, but this is the first attempt I had made.

When I had attended a workshop, the card we made was a tri-fold and if you use the die as it is, you won't get that extra "flap".  The red card base above was on my table for several days before I decided to still go ahead and use it.

The vertical stamp is from Paper Inspirations and the little trees were created using a die from Simon Says.  The dp is a scrap of paper left over from projects in a previous year.

If you want to have a tri-fold card, you will want to trim your card stock to 8 1/2 by 5 1/2 but then trim off a very thin piece from the 8 1/2 inch edge.  Below you will see a picture of how you will place your paper in the die:


Remember if you want to order any of the Stampin' Up items that you see on my blog, you can email me and I'll get them for you.  Thank you for stopping by!  

Thursday, November 21, 2013

STAMPIN UP "TOO KIND" Stamp Set


I love that the flowers are two-step stamps.  I made several cards yesterday using this set and will be showing them on the blog in a few days. 
 
The card base is white card stock and I added Baja Breeze (solid) and Baja Breeze striped dp for the background.  I used Baja Breeze, Marina Mist and Old Olive inks for the flowers.  To finish the image I sponged Old Olive ink around the stems to "ground" them and also very lightly sponged Baja Breeze for some "sky"
 
Although I used two colors for the flower blossoms, it also works well if you want to use just one color.  Stamp off the more solid design once before stamping it onto the image.  Then  stamp the 2nd step with the design fully inked.  You can get a nice result that way as well and there is no problem trying to get two colors to coordinate.

(NOTE:  When this first got posted I had given the wrong name for the stamp set.  I had started to post a different card and then forgot to change the name of the stamp set.)
 
Thank you for stopping by!

FROSTY WINTER MORNING

 
Both of the dies used on this card are from Memory Box.  I had used a friend's dies when we got together last June.  The background paper is from a 12 x 12 Little Yellow Bicycle designer paper.  I loved that the paper looked like it was snowing.  To give the look of some drifts added some Stickles Glitter Glue. 
 
I have a second post for today to show the Stampin Up Stippled Blossom  set.

Wednesday, November 20, 2013

ALTERNATE VERSION OF OCTOBER 28 POST

 
I like this one better simply because the added white piece behind the Poinesttia really set off the flower better.  I also like the added sprig of Holly on the right hand panel of the card.
 
Thank you for stopping by!

Tuesday, November 19, 2013

CHRISTMAS TREE IN RED & WHITE

Today the staff is putting on a Thanksgiving Buffet for the residents where my mother lives and their guests.  Ideally each one would have 1 or 2 family members join them.  I have an appointment that I am unable to change and I am so thankful to my husband for stepping up and offering to join my mother for that meal.  I've heard they put out an outstanding buffet!
 
While I was working on a couple of cards a few days ago using ribbons, I decided to make one more with a combination of red & white ribbons.
 
 
After getting the ribbons taped down in place on the back side, I added another piece of thin white card stock to the back to protect the edges of the ribbons.  The  piece just seemed to plain so I sponged on some Real Red ink around the tree and still wasn't satisfied.  Since the white ribbon had the red polka dots, I punched out some tiny red circles and added them around the tree.It seemed to fill in the blank space better.
 
The final step was to make the big bow using the oval punches as I described in my November 5th post.  Once again the plain white bow looked too plain so I added another red punch to the center.
 
Thank you so much for stopping by!

Monday, November 18, 2013

HOLLY DIMENSIONAL STICKERS

Yesterday my time was spent working on Christmas cards to send to friends and also preparing cards for the residents at the Independent Living Center where my mother lives.  Since many of the residents do not get out to shop, the staff appreciates that I donate cards for the residents to send to their family and friends.  I still need to take pictures of some of the cards I made yesterday. 
 
Last Wednesday I made the cards below.  They are two of the more simple cards that I will be taking for them to use. 
 
Tomorrow I should be able to have a new card for you to see.


Thank you for stopping by!

Thursday, November 14, 2013

DISNEYWORLD AND EPCOT

 
The first night at the Magic Kingdom we were greeted with a beautiful rainbow.

 
Fireworks after a performance outside Cinderella's Castle

 
Cinderella's Castle - special lighting for Christmas

 
The Tower of Terror

 
Entering Epcot

 
One of my favorite pictures - My husband with our Grandson

 
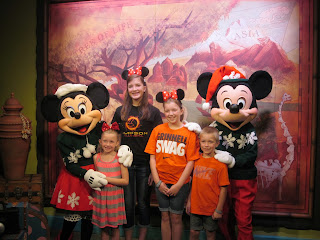
All six grandchildren in their "Mouse Ears"

 
The Lion King show

 
The Lion King

 
"Mt. Everest" in the background - roller coaster ride


Finding Nemo Show


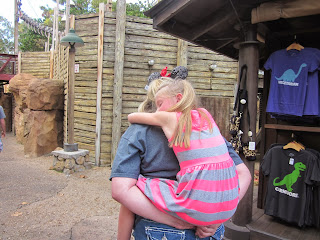
One really tired granddaughter

Wednesday, November 13, 2013

CHRISTMAS CARD IDEA

 
I saw this basic idea on Pinterest. The holly dp was cut to 4 1/4" x 5 1/2" to cover the card base.  Then  I used a Spellbinders Nested Pine Tree die to cut out the shape from the solid color dp and mounted it onto the card base with foam squares.  The dp papers are from a paper pad.  It needed something more and I had this little red bow on my table.
 

This second card was done later in the day.  I like this one a lot better.  The Spellbinders Nested Pine Tree die was used to cut out the shape on the white card stock.  Then on the back side I added strips of dotted ribbon and plain green ribbon.  There is a little piece of brown card stock for the base of the tree.
 
The "Merry Christmas" is from Penny Black.  Thanks for stopping by!

(P.S.  I just noticed that the pictures that I posted yesterday were too big and the entire scene didn't show up so I have modified them.)

Tuesday, November 12, 2013

I'VE BEEN AWAY..........

Last Tuesday, I wished my husband a happy birthday on my blog and mentioned that he would be celebrating in a special way this year.  Last Christmas we gave all of our family a surprise that this November we would be taking the whole family to Disneyworld.  It was not totally planned that we would leave on his birthday, but on November 5th our family flew out for Florida. 
 
We went to the Magic Kingdom first when we got there.  When you visit Disneyworld, it doesn't matter how old you are.......you suddenly feel like a kid again.  I don't have any pictures I can post today from the Magic Kingdom because one of my daughters has my memory card. 
 
The second day our first stop was Cocoa Beach and the grandchildren - actually all of us - had so much fun there.  None of the grandchildren had ever seen an ocean so they had a ball running in the water, turning cartwheels in the water, finding sea shells, writing their names in the sand - etc.


I have some catching up to do but hope to get some new cards posted for you in a few days.  In the meantime I may show you a couple more pictures of our trip.

Monday, November 11, 2013

WHO ELSE HAS DONE THIS?


My friend Lyntte and her husband celebrated their anniversary this past Saturday.  There has been a lot of stress in this house recently and I mistakenly sent her a birthday card!!!  I realized what I had done and found another card to stick in the mail to them before their anniversary.  When I realized what I had done I let her know and told her to consider this card a RAK.  She knew all that had been going on here and naturally understood.  I have a wonderful group of friends on a Yahoo Group!!!

I've never made one of these cards but had seen one at an SU Workshop and then recently saw one again on Pinterest so I decided to give it a try. 
 
I used Stampin' Up dp from a "Just Add Cake" paper pack which is retired.   I had the inside of the card all planned out but wasn't sure how to finish off the front.  Balloons seemed to be a good choice and I had this little stamp sitting on my table.  Balloons from a die or punches would also have been a fun way to decorate the front.
 
Lynette, I hope you and Jim had a special day last Saturday!!!  Here is the ANNIVERSARY card which was sent the day I realized what I had done.


Friday, November 8, 2013

STICKERS ALL USED UP


The card base for both of these cards is Stampin' Up Real Red card stock.  I had two sheets left of these stickers so I decided to do something a little different.  I mounted the main design onto white card stock and trimmed it before adding to the front of the card.   One of the card bases was embossed with the snowflake folder and the other with the "Petals-A-Plenty" folder. 
 
Then I cut out the ornaments and the poinsettias from the second sheet.  The cut out ornaments were added with foam dots on the edges and bottoms of the cut out pieces but glued down the top edge.  Then a "twine" bow was added to the top of each ornament with a glue dot. 
 
For the poinsettias, I simply added the cut out pieces all around with foam dots.  And then added the "Joyous Noel" sticker diagonally between the two flowers.
 
Since I send cards to a lot of elderly people who are in care centers or indepenedent living centers, I need to be able to make some quick and easy cards and yet do my best to make them attractive.

Thank you for stopping by!

Thursday, November 7, 2013

THREE KINGS


The card base is Stampin' Up Close to Cocoa.  The Crushed Curry card stock was but to 4" x 5 1/4", embossed and then Close to Cocoa ink lightly sponged over the top to give it a distressed look.
 
These are stickers from the same sheet as yesterday's card.  I added the sticker to a piece of red card stock and then cut it out with a Spellbinders oval die.  The three "tags" are individual stickers that I added to white card stock and cut out before adding them to the edge of the card.
 
Thank you for stopping by!

Wednesday, November 6, 2013

USING UP MORE SUPPLIES


I have had several sheets of stickers from Penny Black in my supplies and it is time to get them used up so I can concentrate on the new supplies coming from Stampin' Up!  This card can be used for Christmas but the card below can be used for any birthday, get well or thinking of you type of card especially during the winter months.


Thank you for stopping by to check out today's post!

Tuesday, November 5, 2013

HAPPY BIRTHDAY TO MY HUSBAND

I don't have a card that I am posting for my husband, but wanted to note on my blog that I am wishing him a very special birthday this year!  (I'll explain all of that at a later date.)  Today was also my father's birthday who is still missed very much!  Don't forget to tell the special people in your life how much you love them.

RED CHRISTMAS BOW


I'm trying really hard to use up some of the papers from the many little paper pads that I have.  This striped paper was one of them. I cut a piece of white card stock and cut out the tree shape using a Spellbinders die from the Nested Pine Tree set and then mounted it onto the card front using foam dots.  To finish the card, I made this pretty red bow.
 
When I attended the last Stampin' Up workshop, I didn't know how to make these really neat bows but learned that they are SO easy to make using Stampin' Up punches.  Punch two large ovals and two small ovals and fold them in half.  Tape so the folds stay shut.  Assemble them on the card as shown.  The "ties" of the bow are simply a strip of card stock or paper slipped under the loops. The center of the bow could be a large pearl or gem, but to simplify for mailing I used a small circle punch to add to the center.  (Using dp would be much better because card stock is a little too heavy for a nice fold on the ovals, but I didn't have any plain red dp.)

To make the ends of the "ties" you can simply snip out the edges but if you have the SU Hexagon Punch, it is very simple to do them this way.  I believe it was Ann Schach (The Stampin' Schach) who posted this tip one time:  She uses the new Hexagon punch to make the ends of the "ties" on the bow" by just slipping the end of the paper slightly into the edge of the punch like this.

Thank you for stopping by!

Monday, November 4, 2013

STAMPIN' UP! - Snow Much Fun


While I waited for my first order as a demonstrator to arrive, I pulled out this stamp set that I had purchased last year but not in time to use for 2012 Cards.  After stamping and coloring the images, I did add some glitter under the tree and under the snowman's feet.  I don't think it needs any other explanation, but if you have questions, let me know.

Thanks for stopping by!

Friday, November 1, 2013

STAMPIN' UP! - GENTLY FALLING


Some of you may have this stamp set and want to make some simple cards to send friends for Thanksgiving so I am posting this one early. 
I stamped the outline of the leaves with Soft Suede and then the solid colors with Crushed Curry, Cajun Craze and Daffodil Delight.  To make them look a little more real I sponged the Soft Suede over the colors.  The leaf set has a matching die which works great to cut them out.  (Hint:  when you are sponging the Soft Suede onto the colors, sponge outside the lines so that there is no white edge around the leaves.)
 
The leaves were arranged on the upper left corner.  I attached the two outside leaves to the card base and popped the maple leaf with foam dots.  Using the twine, I made a bow with two loops and attached it with a glue dot.  The sentiment is from my old stamp collection.
 
The card stock used for the base has some great speckles of brown and gold that don't show up in the picture but it makes a great background for this card.
 
Thank you for stopping by!

Two more cards using the "All About Autumn" retired dsp. Thank you for coming by today!