A friend of mine, Lynette, had a new grandson born in December and I was able to finally get a card made and off to her a few days ago.
Card base is white. I then cut a piece of SU baby blue card stock approximately 5 1/4" x 4". The background paper is some I've had for a long time and probably came from Michael's. The background paper was trimmed to just slightly smaller than the SU cardstock.
The teddy bear design which I have had for a long time is from Darcie's. I colored it with my Copic markers and then cut and embossed it with my Spellbinders Classic Circles. Using the Spellbinders Scalloped Classic Circles, I cut a layer from the SU baby blue.
I simply placed the design on the paper before adhering it with pop dots so I could determine where to stamp the "Congratulations".
I'd welcome your thoughts about the card............thank you for stopping by!
Sunday, January 9, 2011
Saturday, January 8, 2011
CUP OF HOT CHOCOLATE
Hot chocolate always sounds great on a cold winter night. I started with a 4 1/4" x 5 1/2" piece of white card stock and embossed one half of it with one of my embossing folders. I had the red and white gingham checked paper and thought it would make a nice "table cloth" and punched the edge with a Martha Stewart punch. The cup and saucer which were cut from SU red card stock are a Quickutz die. I edged them with a Memories Metallic Marker to enhance the edges. The cup was then embossed with the Swiss Dots embossing folder. I added some crystal Stickles to the "steam" coming up from the cup so it would show up against the embossed background. The sentiment was stamped and then cut and embossed using Spellbinders Labels 2 -- then attached to the card using pop dots. The entire piece was then mounted onto a standard A2 card.
Supplies: Quickutz die may be purchased at Creating Everlasting Memories
Thank you for stopping by!
Friday, January 7, 2011
GRADUATION
It's a little early, but the way time flies, Graduations will be here before we know it.
I used black cardstock for my base and ran it through the Cuttlebug with my ever-faithful Swiss Dots folder. The stars were made with the Quickutz Nesting Stars. When you cut the stars with this set you get some solid and some outlined stars which can be combined for a nice look. I used a gold shimmer card stock and adhered them to the card by runing the stars through my Xyron.
What do you think?.................Thanks for stopping by!
Supplies:
The dies can be purchased here: Creating Everlasting Memories. At this time they are being offered at 75% off SRP.
I can get the various sizes of Xyrons and refills for you at a discount if you are interested. They are perfect for getting an adhesive onto tiny or narrow pieces such as the stars above.
Thursday, January 6, 2011
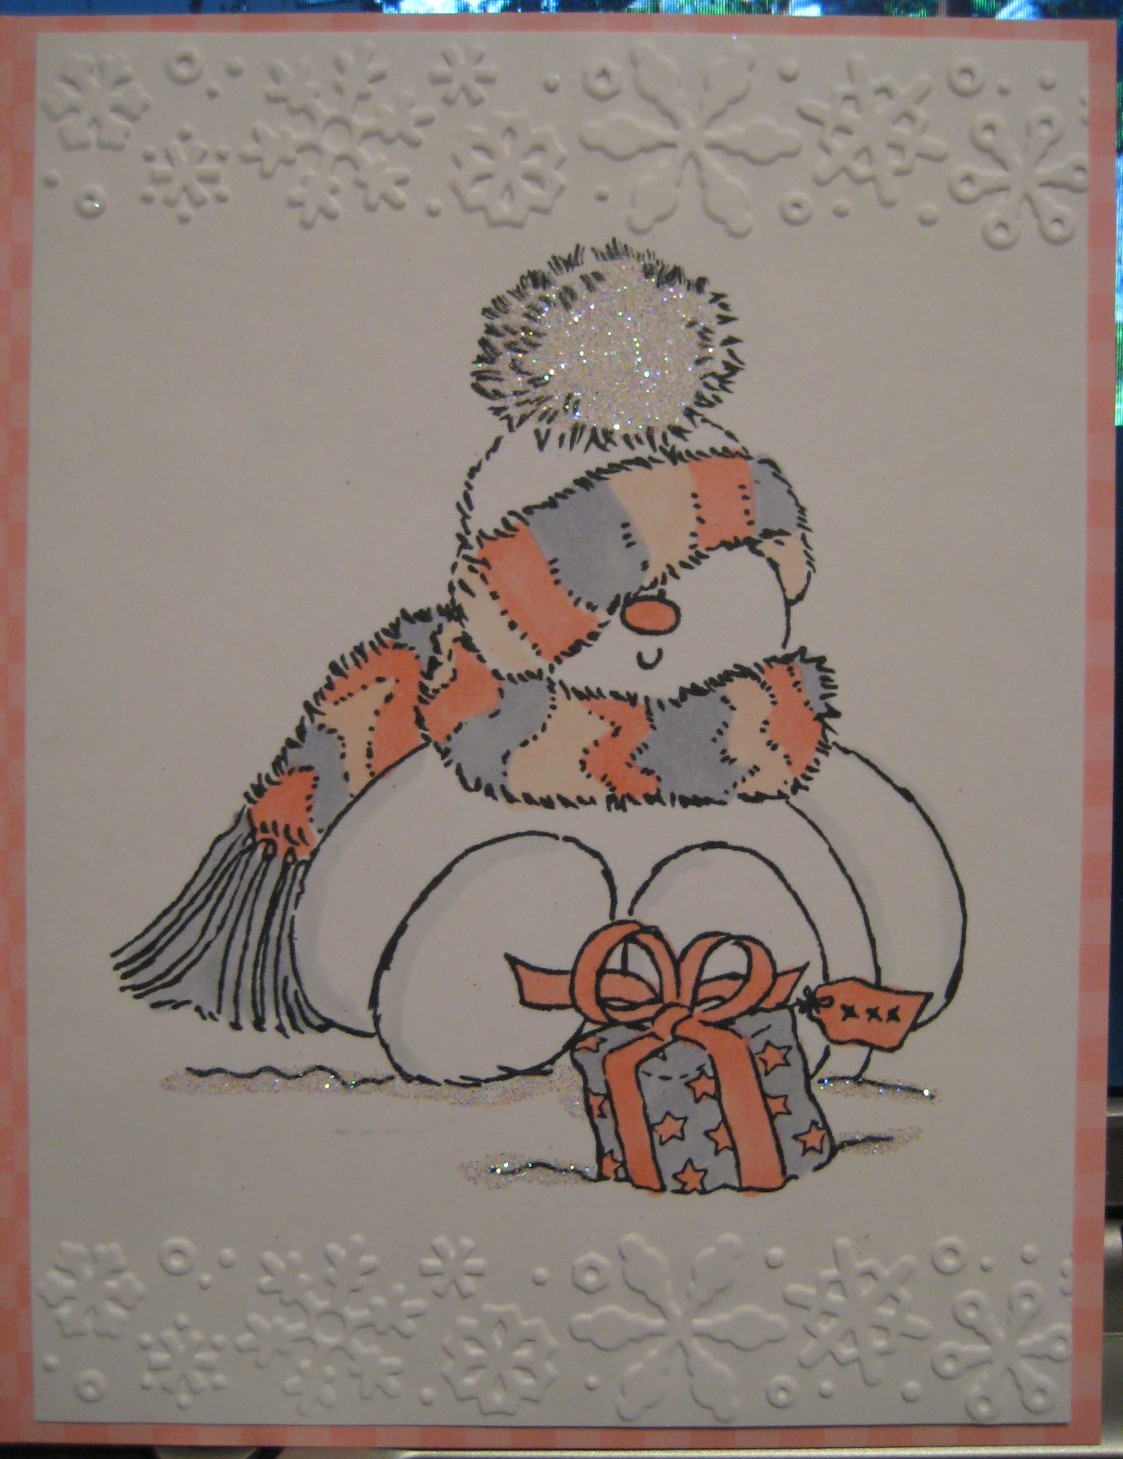
PINK AND GRAY COLOR SWAP
Today's card is one I made for another card swap in our Yahoo Group. The image is from Penny Black and was colored with Copic markers. The design layer was run through the Cuttlebug using a Cuttlebug Snow border folder. Then I added some stickles for the lines of "snow" right under the snowman......the sparkle doesn't show well. This piece was then mounted onto a card base made from Lasting Impressions Cotton Candy card stock which matched the pin I had used for coloring.
Thanks for stopping by...........hope you come back again soon.
Wednesday, January 5, 2011
MAGNOLIA
This is a card I made for a color swap we had in a Yahoo Group of ladies. I used Copic markers to color the design. Spellbinders Nestabilities were used for the ovals. The rectangular white layer was run through the Cuttlebug using a Fiskar plate with a raindrop design........wish it showed up here better.
Tuesday, January 4, 2011
JANUARY CALENDAR
Since I'm a little behind, I didn't get my January Calendar done until yesterday. I did it rather hurriedly and I can't say that I am terribly proud of this one. I love the image that was a stamp off from my friend, Joanne. I knew I wanted to use it for a quick design. I colored with my Copic markers. Since it was a stamp off it needed to be cut out and mounted but the white cardstock for the design was a little different white from the calendar piece. Out of frustration to get it done, I quickly cut a piece of red card stock and ran it through the Cuttlebug to give it something rather than just a plain background.
I had used Crystal Stickles on portions of the design and accidentally got a couple smudges where they didn't belong. Therefore I added some lines of Stickles trying to make it look like snow. I should have left it alone.
Hopefully the February calender will get more attention. I almost didn't post this one.
Thanks for stopping by............
Monday, January 3, 2011
I'M BACK...............
Days upon days have gone by and I am finally getting something posted for you to see. I hope to do better in the days to come. I'm sure most of you also feel that the holidays are important for spending time with family and friends. We had a wonderful holiday but I'm ready to get back to crafting. How about you?
Early in December I made this card for a friend but couldn't post it until I knew she got it. The background was stamped using Hero Arts Shadow Ink "Soft Blossoms" on off white card stock. I had borrowed this stamp from a friend and believe it is retired and from SU. I also had another scrap of this same design so I cut three sizes of ovals from Quickutz "Nesting Ovals". Sorry, I don't remember which flower stamp I used. I have a lot of lace and decided it was time to get some of it out to use. This lace also is trimmed with the pearls.
I sell Hero Arts items so you can order the shadow inks from me if you'd like to give them a try. I love this particular color.
The Quickutz dies I used came from Creating Everlasting Memories. Be sure to check out the site for a lot of great Quickutz sets.
SPECIAL NOTE: If you are interested in seeing clearance Christmas stamps which I have had in my persona "stash", please go to my blog page for clearance items. Be sure to click on the "older posts" link because they are not all shown on the same page. This morning I listed a new group of items I am going to eliminate. Prices do not include the shipping. Take a minute and check out some great items.
THANKS FOR STOPPING BY! HAPPY NEW YEAR TO EVERYONE!
Subscribe to:
Posts (Atom)
GREAT CARD FOR SCRAPS
Although this would be a perfect card for scraps of this or any other paper, I have to confess, I actually cut all of the strips 1/2" w...
-
Card #13 Card #14 I had a request to post a picture of all of these cards together so after I scheduled this post, I too...
-
I don't think this card needs much explanation, so I will just give you the materials I used. Webster Pages Paper "Hollywood Vogue...
-
These were suggested layouts used for the pieces that were cut however I did make some minor changes on the ones I made. I'm ...