Saturday, May 31, 2025


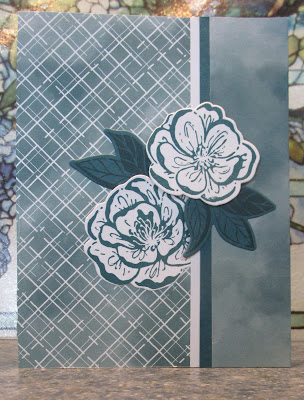
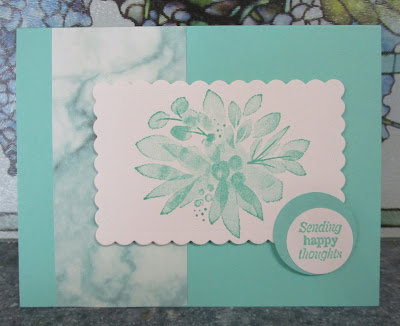
 With this card, I decided to put the rest of the Hello, Irresistable dsp away for the time being.  I don't have much of it left and may either give it away or pitch it.  This is my favorite card I made with the paper in the last few days. 

I saw the design on Pinterest but the layout was reversed.  I put the design to the left side because I discovered a slight flaw in the white card base.  I then I had to adjust the placement of all of the pieces.  I'm really pleased with this card.

Tomorrow is a new month and I think it's time to move on to something new.  Thank you for coming by today!  

Friday, May 30, 2025


These two cards used sheets with the same design.  As you can see I reversed the colors the flowers and leaves on each of the cards.  I also added a narrow white strip to the second card. Which  combination do you like better?   I like these cards much better than yesterday's card which was quite dark.  

Thank you for coming by today!

Thursday, May 29, 2025


This card was made using the directions from Rachel Tessman's video linked in yesteday's post. The dsp is another piece of the 6 x 6  "Hello, Irresistable" dsp.  This format uses a piece that measures 5 1/2" x 6".

Thank you for coming by today!

Wednesday, May 28, 2025


The dsp used on these cards once again is from the "Hello, Irresistable" 6 x 6collection.  The card base is 8 1/2 x 5 1/2 and scored at 4 1/4".  Cuts are made on each side of the front 1 1/4" from the sides an then glued down leaving the front flap free to open.  This first card was made using a light weight white card base and lacked stability so I made as second card below.


Since I was making a second card, I decided to mat the dsp layer on Flirty Flamingo card stock  I like the look much better.  

Thank you for coming by today!


Tuesday, May 27, 2025


Moving on to another retired dsp, this card was made using dsp from the 6 x 6 Hello, Irresistable dsp.  I orderd the pack when it was introduced because of a single card I had seen.  Then when I got it, I had a hard time using some of the designs.  I found this general idea from Rachel Tessman on YouTube here

One of the designs is a sheet of flowers that can be die cut with the coordinating dies  The picture actually shows that I gently curled the petals of the top flower which was added with dimensionals.  A second design has a sheet of leaves but I decided to stamp and die cut the ones I used.


Inside

Thank you for coming by today.
 

Monday, May 26, 2025


The final card using some of the Simply Marbleous dsp.......at least for now.   I added a scrap of the piece to a Coastal Cabana card base.  The image from retired SU Flowing Flowers was stamped with a Misti.  I had to stamp it several times because my ink pad was needing reinked.  I was just happy that I still had the retired ink pad and some of the card stock to go with the dsp.

Thank you for coming by today!

Sunday, May 25, 2025


Instead of using die cuts as the silhouette design, I stamped the image from the Stampin' UP! Fabulous Florets retired stamp set.  I did the stamping with my MISTI because I knew I would have to stamp it several times to get the bold black look I wanted.  Below are two more cards using two different colors. of the dsp.  For all three of these I blended the appropriate ink to show behind the die cut circles.


 Thank you for coming by today!

Saturday, May 24, 2025


Going back to the layout that originally inspired me to make these cards, I used Costal Cabana card stock for the mat and the ink for blending around the area where I would be adding the die cut circle.  The die cut I used for this one is from  Penny Black's Playful II.  The actual die cut is larger, but I cut it apart to use this portion.  (It also has a coordinating stamp.)

Come back tomorrow for three more cards using the same but different idea.  Thank you for coming by today!

Friday, May 23, 2025


The die cut for this card meant using a different layout.  The Blooming Rose design is from Poppy Stamps.

Thank you for coming by today!

Thursday, May 22, 2025


I still have some of the Stampin' UP! Simply Marbleous 6 x 6 dsp and saw this idea on Pinterest.  The card on the right is actually the first one I made.  I cut a 3" circle from the gray piece of dsp.  The sample I saw had blended the coordinating ink around the area before adding the circle to the card mat.  The samples I saw had all used black silhouette die cuts to add to the circles so I pulled out several from my "collection".

After completing that card, I felt like the dsp got lost so I cut another circle and matted it with the Basic Grey card stock but didn't do any blending with the ink.  I like it much better.


I will be posting more cards using some of the other colors of this dsp and other design added to them.

Thank you for coming by today!


Wednesday, May 21, 2025

Rita Holmes used a new bundle from Stampin' UP! to make a card a couple of weeks ago.  I don't have it and really cannot justify the expense right now so I used supplies that I do have.  This card was made using items from four different sets.  I think I'll use this for someone who is retiring.

In case you would like to see the card Rita made, you can see the video HERE.

Thank you for coming by today!

Tuesday, May 20, 2025


This is a layout that Rita Holms used on one of her Tuesday morning videos.  I used a piece of designer paper that I had purchased at Memory Bound in Ankeny IA several years ago.  It happened to go nicely with the retired Stampin' UP! Blushing Bride card stock.


Inside

Thank you for coming by today!


Monday, May 19, 2025


Yesterday I showed a card that I made using a piece from the Dainty Flowers retired dsp.  While looking for some different ideas, I found one that cut it in half.  If I had it to do over, I would have used the dark blue color for the mat on the circle.  

Thank you for coming by today!

Sunday, May 18, 2025


While I was going through some of my many retired paper collections, I found several pieces that had been cut and ready to use on a card.........and a whole 12 x 12 sheet which provided 6 more pieces like this.  I matted the piece and then added it to a white card base  I used a Memory Box die for the butterfly.  I plan to use the rest of the pieces like this next year for Easter cards.  


I have been making a variety of book marks for the local library so I used the center section of the 12 x 12 piece of dsp to make bookmarks.  I trim the pieces to 2" wide and add them to a piece of coordinating card stock.  I use the SU Delightful Tag Topper punch to form the top.

Thank you for coming by today!

Saturday, May 17, 2025


On yesterday's cards, I explained how I was having a difficult time getting the placement just right so that the points of the squares on the left were exactly at the edge.  I tried something completely different this time.  I decided to start with the top triangle.  Once again the pieces were off.  If you look close you can see that the bottom triangle was not cut perfectly in half.  I also forgot to emboss the mat first before adding the papers but embossed it afterward.

I'm not one to give up so one last try.  


SUCCESS!  I remembered to emboss the Vanilla mat first.  When I cut the one square in half diagonally, I was extremely careful to make the cut point to point.  Then I started at the top triangle and worked my way down.   All of the points are along the left edge.  Since everything turned out the way I wanted I decided to step it up and add another mat to really set it off.  I don't know if practice makes perfect but it did take me four tries to get it exactly the way I wanted.


If you decide to make something like this, I used 1 1/4" squares.  To start placing the pieces, started with the top triangle by adding it 1" to the right of the left edge and if you triangle has been cut perfectly, everything should flow from there.

Thank you for coming by today.

Friday, May 16, 2025


There are a lot of ideas for making cards using squares.  Since I have 1" and 1 1/4" punches, it makes it very easy to get squares all the same size.  My mat Vanilla mat is embossed with the Subtle 3D EF.  I chose three patterns from the Timeless Plaid collection and punched two squares from each design.    Once I decided the arrangement of the pieces, I took one of the squares and cut it in half diagonally.  

I had a hard time deciding where to start with the pieces.  I found the half way point along the left side.  I drew a light pencil line that extended past of the mat and started there.  I placed the first square down with the points on the pencil line and then built the pieces from there.

If you look close, you will see that the tips on two corners of the top piece were trimmed off.  The placement of the pieces were off just a tad.  


It was fun making the first card so I pulled out three more plaid pieces.  It is also another pack of retired  paper I am trying to use.  As you can see on this one the squares aren't exactly the same against the left side.  I'm not sure if I will add a narrow strip of a sentiment to these cards.

Tomorrow I have two more using other patterns and finally get the placement exactly right. Thanks for coming by today!
 

Thursday, May 15, 2025


l used the Everyday Happiness dsp and Impressions Abloom dies for this card.
Thank you for coming by today!

Wednesday, May 14, 2025


I'm going to try to get back to using up some of the many retired papers I have.  This one is from the "Hello, Irresistable" collection.

Thank you for coming by today!


Tuesday, May 13, 2025


 These are the last of the cards using Rings of Love dsp I will be posting for the time being.   I still have a very small amount of paper with the birds and with the houses.  I just need to move on for now.  There is one 12 x 12 sheet that I am either going to give away or toss.  I has a very busy pattern of flowers on one side and a plaid of green and red.  Not a fan of either one.

Thank you for coming by today!

Monday, May 12, 2025


More paper from the Rings of Love dsp.  I fussy cut a house from one of the sheets of paper and added it with dimensionals.

Thank you for coming by today!


Sunday, May 11, 2025


Pinterest was definitely a major help for me to get these cards made using this dsp.  The example I saw had used card bases that had a subtle image printed on the front.  I didn't have those so I used the retired Stitched Greenery die for the Soft Sea dsp.  I used a Copic marker to color the white grosgrain ribbon to go with the Soft Sea background.

Thank you for coming by today!


Saturday, May 10, 2025


This card was inspired by one I saw on Pinterest.  I used a different piece of dsp for the "yellow" of my card and a retired ribbon.

Thank you for coming by today!


Friday, May 9, 2025


 I still had some additional pieces of this design.  I cut this piece in half and made two cards.  I made up card kits for the remaining pieces of this design.

Thank you for coming by today!

Thursday, May 8, 2025


During one of the Stampin' UP! Sale-A-Bration periods, there was a pack of Rings of Love dsp.  It was one of the FREE items offered.  I must not have wanted any of the other FREE items because I chose this package.  I've had a really hard time using it other than a sheet that had birds on it.  A few days ago I pulled out what I had left and was determined to get more of it used.  This is my version of one I saw on Pinterest.  

Thank you for coming by today!

Wednesday, May 7, 2025


Yesterday I watched the Tuesday morning video from Rita Holmes.  This is the video.  I did take an easier route to do mine.  I glued strips across the entire piece of white card stock and then cut it apart at an angle.  That way I have TWO cards and didn't have to do all of the the measuring. I used the retired Hues of Happiness dsp.


Inside

Thank you for coming by today!


Tuesday, May 6, 2025


This is another layout I saw on Pinterest using the Everyday Happiness dsp.  I cut mine a little different dimensions and had to make my card a little narrower but still like it.  The Wild Wheat tiny flowers are from Impressions Abloom dies and the white die cuts are extras from another past project.

Thank you for coming by today!


Monday, May 5, 2025


 This card was made using the Everyday Happiness dsp on the Basic Beige card base.  It is a virtual copy of one I saw on Pinterest.  The die cut pieces are from the new Impressions Abloom die set.  I love them!

Thank you for comng by!

Sunday, May 4, 2025

This type of card uses a 6" x 5 1/4" piece of scenic dsp for the inside and depending on how you want to do the outside, another 3" x 5 1/4" from a second sheet.  Terri Gaines shows how to make this card and shows several examples how she completed other cards with a variety of dsp patterns.  A piece of white card stock is added to the back side for a sentiment and/or your signature.


More examples of what I made...........


 Thank you for coming by today!

Saturday, May 3, 2025

I love making "quilt cards" and Julie Heitz has great videos for many patterns.  This video shows how to put pieces together on a 6 x 6 piece of card stock, cut it apart and have 4 cards.  Two of mine are embossed for the "quilting" and two are debossed.  Two used Soft Succulent card cases and two used Evening Evergreen. This is an easy pattern to accomplish.


 Thank you for coming by today!

Friday, May 2, 2025

I COULDN'T WAIT TO POST THIS ONE


This is a card I just couldn't wait to post I've had a pack of the "In Good Taste" dsp from Stampin' Up! for a long time and have not made good use of it.  I wasn't sure where to start with it.  Yesterday while I was roaming around on Pinterest, I saw THIS card from Jan Clothier.  I had to give it a try.  

There were no measurements given so this was all an experiment.  It literally took me HOURS but I GOT IT!  The trees are a different die but very similar.  The sentiment piece is different and I didn't include the twine.  After spending so much time on this one, it is going to have to go to someone very special.  I'd never be able to justify a proper cost to sell it.  A second one would probably go much quicker. though.

I also searched further for ideas with this paper and got a few more ideas that I really liked so I am sure you will be seeing more of it in my posts.

Thank you for coming by today!


Thursday, May 1, 2025

HAPPY MAY DAY!

Sunday night I decided to check out YouTube for some ideas.  I hadn't really watched many videos in the last few days other than Rita Holmes.  I found several that gave me some ideas.  Susan Campfield had received a card from someone and decided to replicate it.  THIS is the video showing how she did it.  On Monday morning I decided to give it a try.  Since I was so sure I knew what I was doing, the measurements I used for the strips are 1/4" shorter than the ones she used, but it still worked fine. 

You will note in the video that the card base is only 5" tall.  That makes it easy for the strips to come out exactly right using 1" widths.


If you watch the video you will see that she just let the reverse side of the dsp show when the card is open.  I decided I'd I rather have the back side the same as the front so I cut extra pieces of those designs and glued them together back to back.  In the future, I would probably make those two strips twice as long, fold them in half after adding glue to the inside of the fold.

Since it is May 1st, I thought about the paper I have with the tulips and it worked great!  For this card, all of the strips were going to be dsp which didn't give much support to the sections hanging over the edge.  I cut the same measurements with the Poppy Parade card stock and adhered all of the dsp pieces to card stock.  This gave the card more stability.  

The card base was of a light weight white card stock, so I added the back of the card to a 4 1/4" x 5 1/4" piece of Poppy Parade card stock.


Thank you for coming by today!


The new arches dies are really fun to work with.  Rita Holmes recently made a card with this layout so I decided to make one as well.   Than...