Saturday, January 29, 2011

BASKETBALL HALL OF FAME

Our local paper had a notice this past Thursday about a former coach who used to teach at our school.  The NJCAA coaches have picked him for the NJCAA Women's Basketball Hall of Fame.  My husband asked me to please make him a special card so we could congratulate him.  (I was honored that my husband even asked me.)

The stamps I used are from the SU "Sporting Goods" set.  I went searching for some ideas on SCS and found several that helped me get this card made.  I don't say this very often but I was very pleased at how it came out and my husband's comment made me know he really liked it too..........and his normal reaction to my cards is just a nod of the head and a slight grin.  :)

Let me know what you think................Thanks for stopping by!

Friday, January 28, 2011

$1.00 STAMP FROM MICHAELS

The other day when I was in Michael's I decided to check out the $1.00 stamps.  The Valentine stamps were in a separate area so I was glad I found them.  I thought this was such a cute little guy.  The dp is from Michael's.  I cut a piece 4 1/4" x 5 1/2" and attached it to the front of the white card base.

I stamped the image on white card stock using Memento Tuxedo Black ink and colored it with Copic CIAO markers (R32 and R35).  The Spellbinders Classic Scalloped Hearts were used to cut out the image and the other two layers.  The large white heart was attached using my tape runner.  The image was attached to the heart from dp paper, but then I popped the medium and small heart with pop dots to the large white one.

I have a Marvy "quotation" punch and since the little bird looks like he is trying to say something I punched a piece and stamped the little sentiment on it.

Supplies:  I can order the Marvy punch, the Spellbinders and the Copic markers for you if you are interested.

Tell me what you think.........and thank you for stopping by!

Thursday, January 27, 2011

LOVE

A Yahoo Group that I belong to will be having a swap the end of February where we are to use a brass stencil.  We can dry emboss or use embossing paste for the design.  The first technique I did when I started making cards was dry embossing with brass stencils and I have quite a collection of them that has been stashed in the closet for way too long.  For those of you on that group who visit here, this isn't the card I"ll be sending but it did make me want to bring out one for Valentine's Day.

First of all I embossed the letters on the white card stock and then used a small Nestabilities Classic Square to cut them out.  The brass stencil actually has more design to it but I only wanted the letters.  I made tiny red vellum flowers with a Martha Stewart punch.  After adding tiny white pearls to the center I glued them to the letters where the embossed flowers would have been.  It worked out really well to attach them to the checked dp so there was a tiny red "frame" around each letter.

Another Martha Stewart punch (Loops Heart) was used to punch both edges of the white layer.  The card base is SU Real Red card stock.  I placed the white layer and gauged where I wanted to add narrow borders using a Cuttlebug embossing folder.

PLEASE NOTE:  I am clearing inventory of brass stencils (new and in package) so if you are interested in adding to your own collection, please email me at vboddicker@aol.com

Thanks for stopping by.  Your comments are always appreciated!

Tuesday, January 25, 2011

SPELLBINDERS LOTUS DIE

Yesterday I received a packet of this gorgeous paper from Joans Gardens.  I saw another of the patterns of this paper used on Selma's blog page and I knew I was going to order it.  (She is such an enabler.!  The paper is Graphic 45 "Once Upon a Springtime" and is the 8 x 8 pad.

I cut the two pieces of patterns to cover half of the card front and then a narrow piece of the stripe to cover the seam.  The Spellbinders Lotus die set is one that I ordered several months ago but had not used.

The sentiment used is from a JustRiteStampers set called "Birthday Sentiments Set". It was stamped with VersaMark ink and embossed with Egyptian Gold embossing powder.  Next I cut the image with one of the Spellbinder Classic Scalloped Circles and attached it to the center of the Lotus piece.

Don't you just love this paper?  Thanks for stopping by!

Supplies:  If you are interested, I can order the Spellbinders dies, JustRiteStampers and the embossing powder.

Monday, January 24, 2011

CUPID DIE

Today's card uses the same Cupid die that was on yesterday's card.  I love this punch set from Martha Stewart and used it as the backround for the cupid.  The entire piece was mounted on a red card base that had been run through the CB using one of my Cuttlebug Heart folders.

Let me know if you have any questions.  Thank you for stopping by!

Sunday, January 23, 2011

SUGGESTIONS FOR VALENTINE

This is a very simple Valentine and I'm wondering if it needs something further.  The card base was embossed with a Cuttlebug embossing folder.  The red hearts were made with Spellbinders Classic Scalloped Hearts.  The Cupid was made with a Quickutz die KS-0788 which you can find here on sale for only $2.80:  "Cupid" Die

Any suggestions for improvements on this card would be welcome!  Thanks for stopping by!

Saturday, January 22, 2011

SNOOPY'S BIRTHDAY

Who doesn't like Snoopy and all the Charlie Brown characters?  I thought I'd put this card together for my MIL to give to our grandson for his birthday in a couple of weeks. 

The front of the white cardstock was embossed with a Cuttlebug embossing folder.  The stamp is from Stampabilities.  I stamped the design with Memento Tuxedo Black ink and then colored with my Copic CIAO markers.  The design and the turquoise layer were cut with Spellbinders Classic Rectangle dies and then mounted onto the front of the card using pop dots.

The CIAO markers (and Sketch markers), Ink, Spellbinders dies and pop dots can all be ordered here.

Thank you for stopping by!

Friday, January 21, 2011

USING SCRAP PIECES

These papers come from a 6 x 6 paper pad and are the pieces left over from yesterday's card.  The first thing I did was to lay the flowered paper about where I wanted it to determine where to emboss the two scalloped borders around it.  After embossing the borders, I attached the flowered paper and the sentiment which was cut using a Spellbinders die which I can order for you from JustRiteStampers.  The solid colored paper was added to the bottom of the card and I attached a border of butterflies made with a Martha Stewart punch.  Very simple and quick to make.

And just a reminder, you might want to take time to click on this link to see 30 new Spellbinders designs which will be available following the Winter 2011 CHA:  Spellbinder dies  If you see something you want just email me and I'll put you on the pre-order list. 

Thank you for stopping by!

Thursday, January 20, 2011

PREVIEW OF NEW SPELLBINDERS DIE SETS

SPECIAL NOTICE: For those of you who do not check out my other blog pages with items that I sell, you might want to click on the page for Spellbinders and see the 30 items that I just posted giving you a preview and opportunity to give me any pre-orders for items that you will want to purchase. The sooner I know what you want, the sooner I'll be able to get these items ordered. Thanks for taking the time to check them out. There are a lot of great new designs.

MARTHA STEWART PUNCH ALL OVER THE PAGE

I rarely get the chance to get to Michael's anymore but then that is good for my credit card.  This week however I did make visit since I was in the vicinity anyway.  Somewhere I heard about the new Martha Stewart "Punch All Over the Page" punches and decided I'd give one a try just to see how well they work.   As you can see I was able to punch three of them vertically on this card.  I really like the punch and just now discovered you can purchase this punch here:  Martha Stewart (42-90003) "Butterfly" Punch All Over on the Creating Everlasting Memories eBay store site and it is 25% off right now.

The papers are from a Basic Grey "Lilykate" 6 x 6 paper pad.  After punching the three butterflies from the solid colored papers, I mounted that layer onto the patterned piece which was cut slightly larger.  I add one of the solid punched pieces to the middle butterfly and flipped the wings.  Three tiny pearls were added to each of the butterflies although they may not show clearly on the picture.

A Martha Stewart edge punch was used on the sides of the "Thinking of You" panel.

Monday, January 17, 2011

WEDDING COUPLE SILHOUETTE


The die for this card is about an inch longer than I could fit on this card which is 4 1/2" X 6 1/4".  It makes a very nice card for a couple getting married.   The die came from Creating Everlasting Memories.

The card base was embossed with an elegatnt embossing folder.  The dies were cut from black and pink card stock.  The veil was cut from vellum.  After assembling the pieces and attaching them to the card, I added the SU pink sheer ribbon to the left hand side of the card and some tiny pink flowers which were attached using Diamond Glaze.  I think if I make another one of these, I am going to try attaching small pink vellum flowers so it would be easier to insert in an envelope.

Thanks for stopping by!  Comments are always welcome!

Supplies:
Die set (CC-SHAPE-3-040) Bride & Groom is currently on sale for 75% off retail  at this site:   "Bride & Groom"
Diamond Glaze and other adhesives can be purchased by contacting me.

Sunday, January 16, 2011

THINKING OF YOU

I have a lot of JustRiteStampers sets and have not made good use of them at all.  Lately I have been trying really hard to use things that I have purchased but never used.  I needed a card to send to a friend of mine and chose this JustRite design. 

First I took a white card base and ran about the top half of the front through the Cuttlebug using the embossing folder.  The striped paper is from a KaiserCraft "Utopia" 6 x 6 paper pad and was added to the bottom half of the card front.  The design was stamped in Memento Tuxedo Black and then colored with Copic CIAO markers in colors that matched the striped paper I had chosen to use.  The Spellbinders Classic Oval and Classic Scalloped Oval were cut and then mounted on the card using pop dots.

Your comments are always welcome.  Thanks for stopping by!

Supplies:
JustRiteStamper items and Copic CIAO markers (as well as Sketch markers) can be ordered by contacting me.
Memento ink pads (also all inks from Tsukineko as well as pads from Ranger) can be ordered by contacting me.

Saturday, January 15, 2011

FROM MY HOUSE TO YOURS

This is a card I made using the (Rev-0215-S) "House" Die and the (Rev-0093) "Photo Corners" both of which are on sale right now for 75% off. 

The card base is SU Wild Wasabi card stock and I embossed the bottom edge with a Cuttlebug border folder.  The paper with the script design and the off white for the main part of the house are Lasting Impressins papers.  The other shapes for the die cut pieces were cut from Core'dinations strips that I received in a sample pack of the Mother Nature's colors.  (I wish I could remember how I happened to get them.)

Thanks for stopping by...........hope you come again soon.

Supplies: 
Dies may be ordered from Creating Everlasting Memories on the links provided above
I have a supply of Lasting Impressions papers for sale

Friday, January 14, 2011

BUTTERFLY DIE

The papers on this card are from a KaiserCraft "Tea at Elsie's Collectoin" 6 x 6 paper pad.  I just love the papers in this set.  I used a die from Creating Everlasting Memories and the listing for it is here:  (Rev-0139) "Butterfly" Die.  At this time it is discounted 75%.....so grab a good deal while you can.  The sentiment is from My Sentiments Exactly and was cut with a Spellbinders die which I ordered from JustRite Stampers.

The green layer was run through the Cuttlebug with the "leafy branch" folder.  I ran the larger flowered pieces, the larger coral pieces and the sentiment through my Xyron to add adhesive to those pieces.  Then I used a tiny dot of Stickles to attach the really 8 tiny pieces of the flowered print to the wings.

Thank you for coming by!

Supplies:
The butterfly die can be purchased from Creating Everlasing Memories as shown above
If you are interested in the Spellbinders dies from JustRite Stampers, Xyron (including refills) or Stickles, just email me at the contact email address given on the right hand of this blog page.

Wednesday, January 12, 2011

RED CARDINAL

One of the blogs I like to follow is Selma's Stamping Corner.  You can find a link to her blog below and on the right of this page.  She is a designer for Joan's Gardens.  Joan sells a lot of Heartfelt Creations stamps with coordinating dies.  Cardinals are such a beautiful bird and this card was made with one of the designs. 

The snowflake border on two sides of the card was made by running the card through the Cuttlebug twice with the Snowflake border folder.  The design stamped twice.  The cardinal was cut out of one stamp off and then cut out using a matching die.  The pieces were then colored with Copic CIAO markers.

Supplies:
I can get the CIAO (or Sketch) Copic markers and Liquid Applique used for the snow on the branch.
Red card stock is from SU
Cardinal stamp and die are from Joans Gardens

Thank you for stopping by!  Your comments are always welcome and appreciated!

Tuesday, January 11, 2011

BIRTHDAY FOR A FRIEND

My friend, Terri, has a birthday during the month of January.  I try to send cards early and I know she has received this so it's safe to show it.  The colored layer is Tempting Turquoise SU card stock.  I colored the design using my Copic CIAO markers.  I can't find the stamp set I used so sorry I can't tell you right now who made it.  I don't think the card needs a lot of explanation.

Thanks for coming by!

Sunday, January 9, 2011

IT'S A BOY!

A friend of mine, Lynette, had a new grandson born in December and I was able to finally get a card made and off to her a few days ago. 

Card base is white.  I then cut a piece of SU baby blue card stock approximately 5 1/4" x 4".  The background paper is some I've had for a long time and probably came from Michael's.  The background paper was trimmed to just slightly smaller than the SU cardstock. 

The teddy bear design which I have had for a long time is from Darcie's.  I colored it with my Copic markers and then cut and embossed it with my Spellbinders Classic Circles.  Using the Spellbinders Scalloped Classic Circles, I cut a layer from the SU baby blue. 

I simply placed the design on the paper before adhering it with pop dots so I could determine where to stamp the "Congratulations".

I'd welcome your thoughts about the card............thank you for stopping by!

Saturday, January 8, 2011

CUP OF HOT CHOCOLATE

Hot chocolate always sounds great on a cold winter night.  I started with a 4 1/4" x 5 1/2" piece of white card stock and embossed one half of it with one of my embossing folders.  I had the red and white gingham checked paper and thought it would make a nice "table cloth" and punched the edge with a Martha Stewart punch.  The cup and saucer which were cut from SU red card stock are a Quickutz die.  I edged them with a Memories Metallic Marker to enhance the edges.  The cup was then embossed with the Swiss Dots embossing folder.  I added some crystal Stickles to the "steam" coming up from the cup so it would show up against the embossed background.  The sentiment was stamped and then cut and embossed using Spellbinders Labels 2 -- then attached to the card using pop dots.  The entire piece was then mounted onto a standard A2 card.

Supplies:  Quickutz die may be purchased at Creating Everlasting Memories

Thank you for stopping by!

Friday, January 7, 2011

GRADUATION

It's a little early, but the way time flies, Graduations will be here before we know it. 

I used black cardstock for my base and ran it through the Cuttlebug with my ever-faithful Swiss Dots folder.  The stars were made with the Quickutz Nesting Stars.  When you cut the stars with this set you get some solid and some outlined stars which can be combined for a nice look.  I used a gold shimmer card stock and adhered them to the card by runing the stars through my Xyron.

What do you think?.................Thanks for stopping by!

Supplies:
The dies can be purchased here:  Creating Everlasting Memories.  At this time they are being offered at 75% off SRP. 

I can get the various sizes of Xyrons and refills for you at a discount if you are interested.  They are perfect for getting an adhesive onto tiny or narrow pieces such as the stars above.

Thursday, January 6, 2011

PINK AND GRAY COLOR SWAP

Today's card is one I made for another card swap in our Yahoo Group.  The image is from Penny Black and was colored with Copic markers.  The design layer was run through the Cuttlebug using a Cuttlebug Snow border folder.  Then I added some stickles for the lines of "snow" right under the snowman......the sparkle doesn't show well.  This piece was then mounted onto a card base made from Lasting Impressions Cotton Candy card stock which matched the pin I had used for coloring.

Thanks for stopping by...........hope you come back again soon.

Wednesday, January 5, 2011

MAGNOLIA

This is a card I made for a color swap we had in a Yahoo Group of ladies.  I used Copic markers to color the design.  Spellbinders Nestabilities were used for the ovals.  The rectangular white layer was run through the Cuttlebug using a Fiskar plate with a raindrop design........wish it showed up here better.

Tuesday, January 4, 2011

JANUARY CALENDAR

Since I'm a little behind, I didn't get my January Calendar done until yesterday.  I did it rather hurriedly and I can't say that I am terribly proud of this one.  I love the image that was a stamp off from my friend, Joanne.  I knew I wanted to use it for a quick design.  I colored with my Copic markers.  Since it was a stamp off it needed to be cut out and mounted but the white cardstock for the design was a little different white from the calendar piece.  Out of frustration to get it done, I quickly cut a piece of red card stock and ran it through the Cuttlebug to give it something rather than just a plain background.

I had used Crystal Stickles on portions of the design and accidentally got a couple smudges where they didn't belong.  Therefore I added some lines of Stickles trying to make it look like snow.  I should have left it alone. 

Hopefully the February calender will get more attention.  I almost didn't post this one.

Thanks for stopping by............

Monday, January 3, 2011

I'M BACK...............

Days upon days have gone by and I am finally getting something posted for you to see.  I hope to do better in the days to come.  I'm sure most of you also feel that the holidays are important for spending time with family and friends.  We had a wonderful holiday but I'm ready to get back to crafting.  How about you?

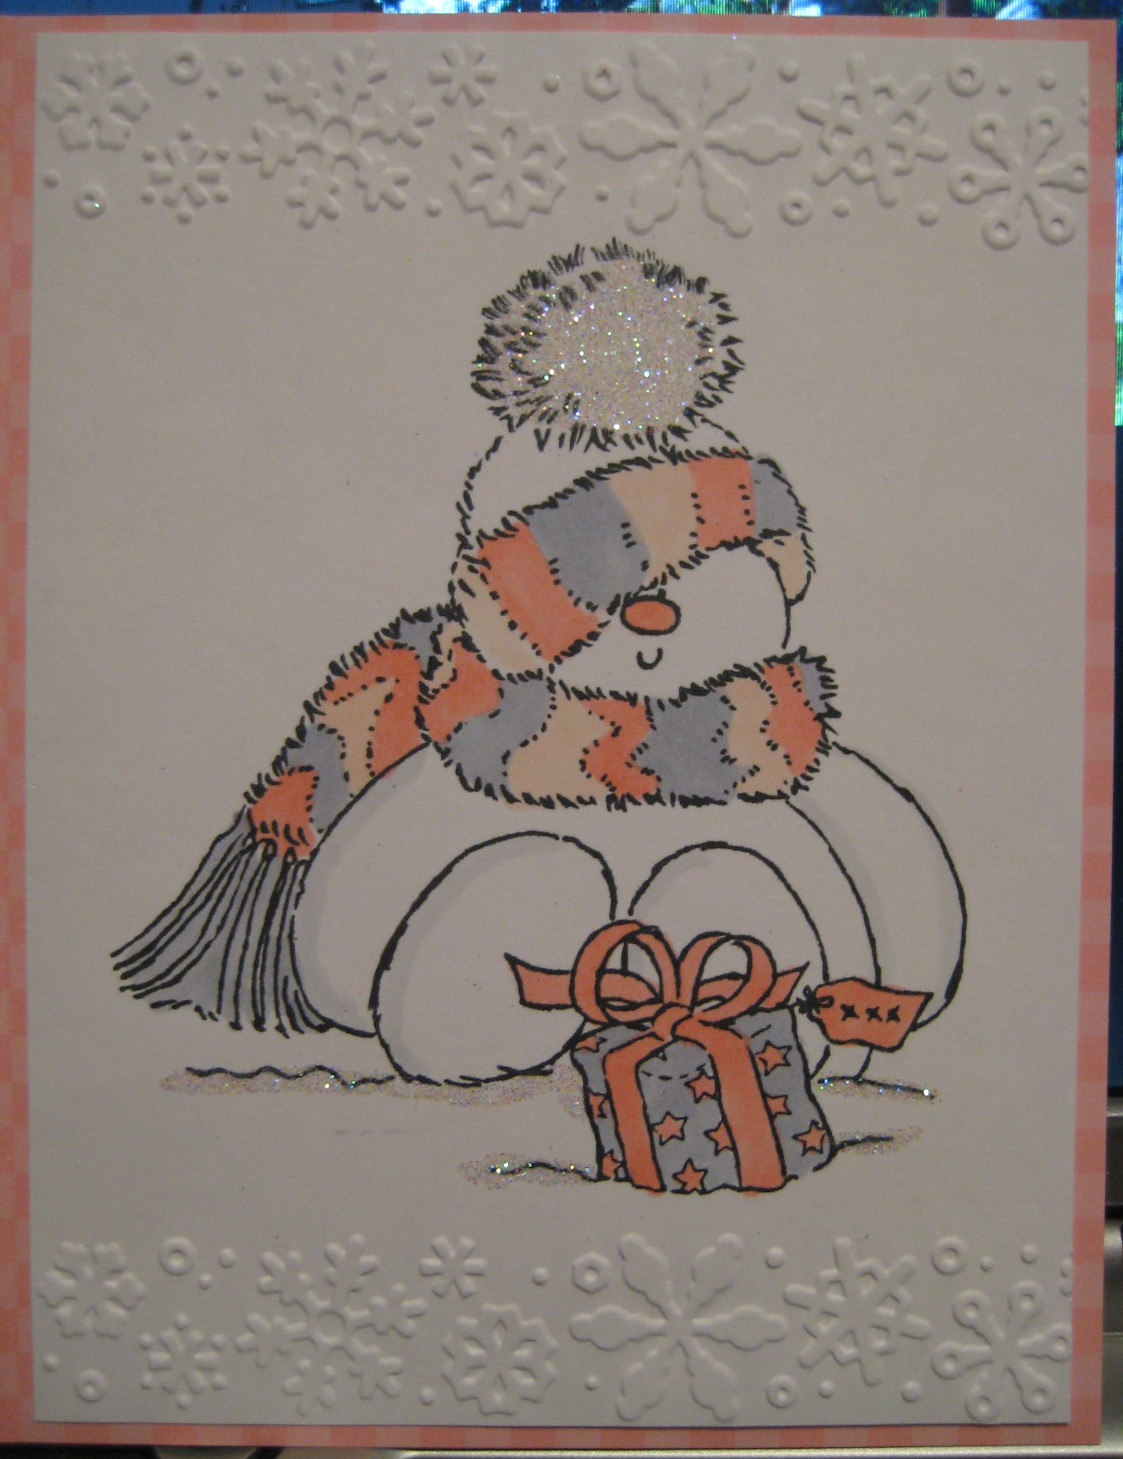
Early in December I made this card for a friend but couldn't post it until I knew she got it.  The background was stamped using Hero Arts Shadow Ink "Soft Blossoms" on off white card stock.  I had borrowed this stamp from a friend and believe it is retired and from SU.  I also had another scrap of this same design so I cut three sizes of ovals from Quickutz "Nesting Ovals".  Sorry, I don't remember which flower stamp I used.  I have a lot of lace and decided it was time to get some of it out to use.  This lace also is trimmed with the pearls.

I sell Hero Arts items so you can order the shadow inks from me if you'd like to give them a try.  I love this particular color.

The Quickutz dies I used came from Creating Everlasting Memories.  Be sure to check out the site for a lot of great Quickutz sets.

SPECIAL NOTE:  If you are interested in seeing clearance Christmas stamps which I have had in my persona "stash", please go to my blog page for clearance items.  Be sure to click on the "older posts" link because they are not all shown on the same page. This morning I listed a new group of items I am going to eliminate.  Prices do not include the shipping.  Take a minute and check out some great items.

THANKS FOR STOPPING BY!  HAPPY NEW YEAR TO EVERYONE!

This is the  video  I used to make this card using more retired dsp. After I finished, I was a little dissatisfied with the white background...